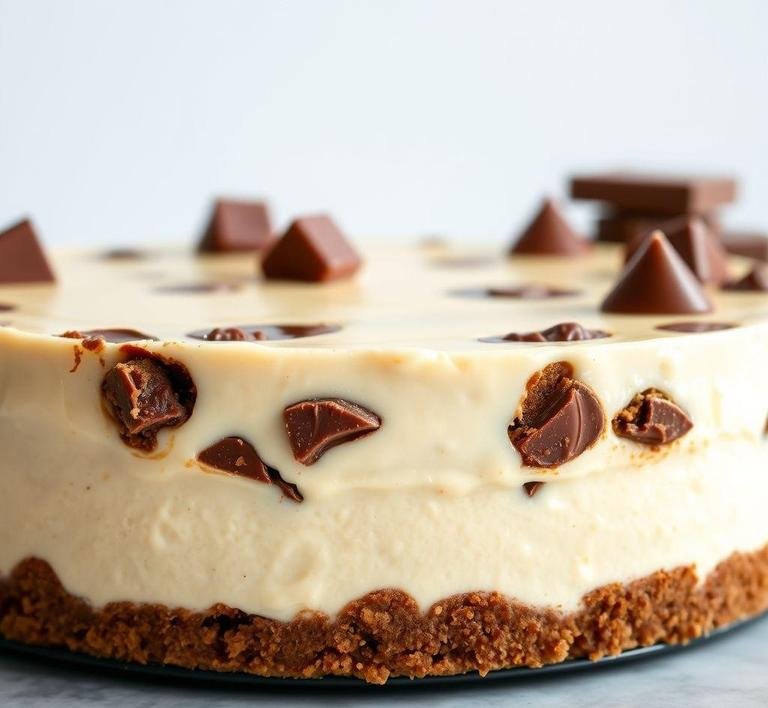
Nigella’s Toblerone Cheesecake is a no-bake, creamy cheesecake that celebrates the unique, nutty chocolate flavor of Toblerone bars. It’s luscious and smooth, yet it has this wonderful crunch from the chocolate and honeycomb bits in the Toblerone. It’s the kind of dessert that feels effortlessly fancy but really, it’s quite straightforward to whip up. perfect for when you want to impress without the stress.
What I love most about it is how Nigella’s signature style shines through. she never complicates things unnecessarily. This cheesecake relies on simple ingredients combined in a way that feels luxurious. The base is buttery and crunchy, the filling is velvety with white chocolate and cream cheese and then the Toblerone folded in adds that perfect balance of sweet, nutty and honey flavors. It’s a dessert that’s as much about texture as it is about taste. No baking means it’s perfect for warmer days or when you just want to avoid heating up your kitchen.
Nigella Toblerone Cheesecake Recipe
Ingredients Needed
Now, gathering the ingredients for this cheesecake felt a bit like going on a mini treasure hunt, because Toblerone is the star and it demands quality. Here’s what you’ll need:
- Toblerone chocolate bars – About 300 grams. You want the classic honey and almond kind; it’s what gives this cheesecake its soul.
- Digestive biscuits – Roughly 200 grams, crushed into crumbs for the base. These give the crust that buttery crunch.
- Unsalted butter – Around 100 grams, melted to bind the biscuit base.
- Cream cheese – About 250 grams, full-fat is best for that rich creaminess.
- Double cream (heavy cream). 300 ml, whipped to add lightness and softness to the filling.
- Icing sugar – Just a couple of tablespoons to sweeten everything without overpowering.
- Vanilla extract – A splash, to enhance the flavors.
That’s really it. No fancy, hard-to-find items. It’s all straightforward but comes together in this wonderfully indulgent way.
Equipment Needed
This part is surprisingly minimal which is one reason I adore this recipe:
- A springform cake tin (about 20 cm/8 inches). It makes unmolding the cheesecake a breeze.
- A mixing bowl or two. For combining the base and the filling.
- An electric whisk or hand mixer. To whip the cream until it’s soft and billowy.
- A spatula – For folding the Toblerone and cream cheese mixture gently.
- Something to crush the biscuits. I usually pop mine in a ziplock bag and give them a few good whacks with a rolling pin but you could also blitz them in a food processor.
- A grater or sharp knife. To chop or shave the Toblerone into the mixture.
Honestly, the equipment is almost the least of your worries here; it’s the ingredients and patience that matter most.
Instructions To Make Nigella Lawson’s Toblerone Cheesecake
I remember sitting down with the recipe and just breaking it into clear, simple steps which helped me not get overwhelmed.
- Prepare the base: Crush your digestive biscuits until they resemble coarse sand, then mix them with the melted butter until it’s all well combined. Press this mixture firmly into the bottom of your springform tin, creating an even, compact base. Pop it in the fridge to set while you prepare the filling.
- Prepare the filling: Break or chop your Toblerone into small pieces. this is the fun part because you get to play with chocolate. In a bowl, beat the cream cheese until smooth and creamy. Whip your double cream with icing sugar until soft peaks form, then gently fold the cream into the cream cheese. Now, fold in the chopped Toblerone and a little vanilla extract, being careful not to overmix so you keep that light, airy texture.
- Assemble and chill: Pour the filling over your biscuit base, spreading it evenly. Cover with cling film and leave it in the fridge for at least 4 hours, preferably overnight. This patience bit really pays off because it lets the flavors marry beautifully and the cheesecake firms up perfectly.
- Serve: Once set, carefully release the springform and admire your masterpiece. I often sprinkle a few more shards of Toblerone or a light dusting of cocoa powder on top for that final flourish.
What I Learnt
Making this cheesecake taught me a few valuable things. not just about baking but about confidence in the kitchen. First, it’s okay to rely on simple, quality ingredients. Toblerone and cream cheese don’t need fancy add-ons to shine. Also, I learned that no-bake desserts can be just as impressive as baked ones. if not more, especially when you nail the texture and flavor balance.
Patience is key, too. I used to be guilty of rushing to dig in before a cheesecake was properly set, only to end up with a messy plate. Giving it the time it needs in the fridge transforms the whole experience.
And lastly, Nigella’s approach reminds me that food should feel like a pleasure, not a chore. This cheesecake feels indulgent but is straightforward enough for a weekend treat or special occasion. I even made it once for a friend’s birthday and seeing her delight was the best reward.
FAQs
Can I Make Nigella Lawson’s Toblerone Cheesecake Ahead Of Time?
Absolutely! One of the best things about this cheesecake is that it actually gets better after a day or two in the fridge. The flavors have time to meld, and the texture firms up just perfectly. So, if you’re prepping for a party or a gathering, feel free to make it a day ahead. Just be sure to let it chill properly in the fridge.
What Can I Use If I Can’t Find Toblerone Chocolate?
You can totally swap the Toblerone for any good-quality milk chocolate, but let’s be real-Toblerone adds that unique, crunchy honeycomb vibe that’s hard to replace. If you’re not married to the idea of Toblerone, a chocolate with a similar texture, like Galaxy or a milk chocolate bar with caramelized bits, will give you a similar result.
How Do I Prevent The Cheesecake From Cracking On Top?
Ah, the classic cheesecake dilemma! To keep your cheesecake from cracking, it’s all about gentle handling. Don’t overmix the filling, as too much air can cause cracks. Also, make sure you let it cool slowly-don’t rush it with the fridge or freezer. I like to leave it in the oven (turned off) with the door ajar for a bit before moving it to the fridge. This way, it cools gradually and minimizes those cracks.