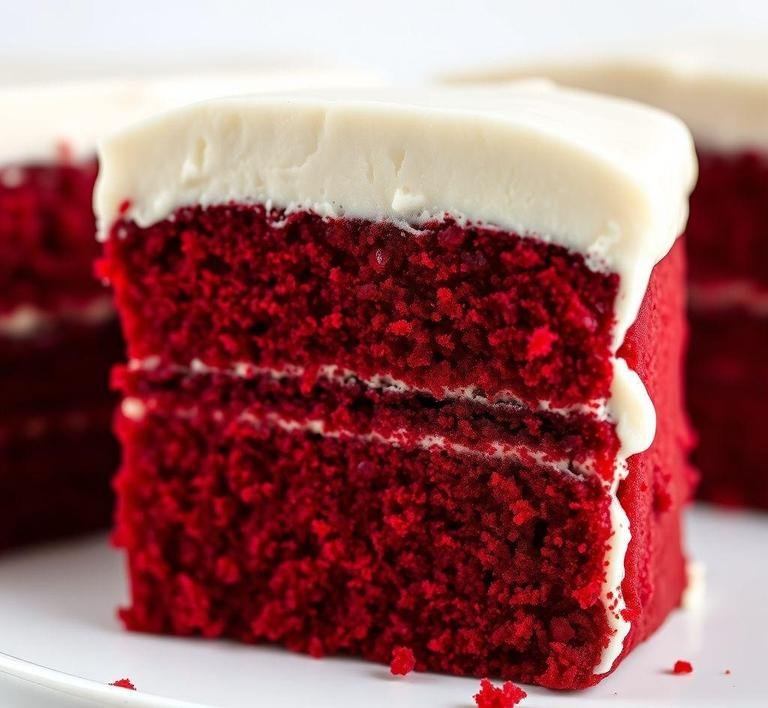
Red velvet cake always felt like a mystery to me growing up-neither a full-on chocolate cake nor a plain vanilla sponge but somehow richer, smoother and wildly more romantic. The first time I heard about it was in a movie, probably during one of those rainy Sunday afternoons when I’d be curled up with a blanket and leftover popcorn. Years later, when I stumbled across Nigella Lawson’s version, it was like meeting a celebrity I’d adored from afar. Her recipe doesn’t just capture the look. it captures the soul of red velvet.
Nigella’s take on red velvet is unapologetically rich, defiantly red and delicately flavored. It’s moist (yes, I said it), with just enough cocoa to whisper ’chocolate’ without shouting. And let’s talk about the cream cheese frosting-sweet, tangy, lush. It’s the kind of frosting that insists you lick the spoon before you wash it. This cake is a celebration dressed in deep scarlet, meant for birthdays, breakups, reunions or just a Wednesday night that needs some sparkle.
Nigella Red Velvet Cake Recipe
Ingredients Needed
Ah, the moment of truth. When I first made this cake, I was missing exactly one ingredient-white vinegar-and tried to ’wing it’ with apple cider vinegar. Spoiler: it still worked but I could tell. It’s worth having the right stuff.
Here’s what you’ll need as per Nigella’s original red velvet spell:
For The Cake
- 250 ml buttermilk (or make your own with 1 tbsp vinegar + milk)
- 2 tsp red food coloring (Nigella goes bold-liquid coloring works best here)
- 1 tsp vanilla extract (real vanilla, if you can. this is not the place for compromise)
- 200 g plain flour
- 1/2 tsp bicarbonate of soda
- 2 tbsp cocoa powder (unsweetened, good-quality cocoa makes a difference)
- 100 g soft unsalted butter
- 200 g caster sugar
- 2 large eggs
- 1 tsp white wine vinegar
For The Cream Cheese Frosting
- 500 g icing sugar
- 125 g cream cheese (cold)
- 125 g soft unsalted butter
- 1 tsp vanilla extract
I remember opening the fridge the first time and finding my butter still cold and hard. Word to the wise: set everything out an hour before. Cold ingredients = dense cake. I learned that one the crumbly way.
Equipment Needed
You don’t need to turn your kitchen into a baking lab but a few tools make all the difference:
- Two 20cm round cake tins (lined and greased. don’t skip the parchment, trust me)
- Electric mixer (handheld or stand mixer)
- Mixing bowls (two medium, one large)
- Fine sieve for sifting
- Measuring cups/spoons
- Spatula (for the frosting swirl. it’s part of the art)
- Cooling rack
I once tried to cool my cake on a plate. It steamed the bottom and went slightly soggy. A wire cooling rack might seem like a luxury but it’s an unsung hero in the world of cake integrity.
Instructions To Make Nigella Lawson’s Red Velvet Cake
Alright, apron on. Here’s how I do it and I follow Nigella’s rhythm almost like a ritual.
1. Prep Everything
Preheat your oven to 170°C (325°F). Butter and line your tins. I always take a quiet moment here, letting the anticipation settle in. There’s something sacred about prepping for a cake.
2. Mix The Wet Ingredients
In a jug, stir together the buttermilk, red food coloring and vanilla extract. This mix looks like a potion-bold red, almost velvety already.
3. Sift The Dry
In a medium bowl, sift together flour, bicarbonate of soda and cocoa powder. This step makes everything cloud-light.
4. Cream The Butter And Sugar
In a large bowl, beat the butter and sugar until pale and fluffy. Don’t rush this. When it looks like whipped clouds, add the eggs one at a time, beating well after each.
5. Combine The Magic
Add your flour mixture alternately with the red buttermilk mix, starting and ending with flour. Mix gently-this isn’t a whisk-frenzy. Stir in the vinegar last. The batter turns silky, luscious and vivid.
6. Divide And Bake
Pour into the tins and bake for about 25-30 minutes. Use a skewer to test-clean means done. Cool in the tins for 10 minutes, then transfer to a wire rack. I usually make tea while I wait. It’s part of the ceremony.
7. Frosting Time
Beat the icing sugar with the butter until smooth (cover the bowl with a clean tea towel to avoid a sugar blizzard). Add the cream cheese and vanilla, then beat until it’s soft, whipped and tempting.
8. Assemble The Masterpiece
Spread frosting between the layers, then cover the whole cake. Use swirls and swoops. it’s not meant to be perfect. It’s meant to be yours.
What I Learnt
Here’s the thing-I thought baking was about precision. And in a way, it is. But what Nigella’s red velvet cake taught me is that baking is also about rhythm, patience and mood.
I learnt that room temperature ingredients matter more than I expected. That cake tins aren’t just interchangeable sizes. That food coloring is more than aesthetic. it’s part of the identity here.
But most of all, I learnt that baking something beautiful, from scratch, for no reason other than joy, is an act of self-love. I’ve baked this cake for friends, for family, for birthdays and yes, once at 10 p.m. after a rough week. because it was the therapy I needed.
FAQs
What Makes Nigella Lawson’s Red Velvet Cake Different From Others?
Nigella’s version stands out because of its incredibly moist texture, thanks to the buttermilk and oil combination. Plus, she uses a hint of cocoa powder to balance the richness of the cream cheese frosting, which gives it a nice depth of flavor without being overpowering. It’s a more subtle approach compared to some red velvet cakes that lean a bit too much on the artificial color or overly sweet frosting.
Can I Make Nigella’s Red Velvet Cake Ahead Of Time?
Definitely! The cake actually gets better after a day or two as the flavors meld together. You can bake the cake layers, let them cool completely, then wrap them tightly and store them in the fridge for up to two days before frosting. The frosting itself also holds up well in the fridge, just make sure to let it come to room temperature before spreading it on the cake.
Do I Need To Use Food Coloring For Nigella’s Red Velvet Cake?
Nigella does call for red food coloring in her recipe, but you can definitely use less or skip it if you’re not into the vibrant red color. The cake will still taste just as amazing, though it will be more of a chocolate cake in appearance rather than the iconic red velvet look. If you’re trying to avoid artificial dyes, you could also experiment with natural colorants like beet juice, though it might slightly change the flavor.