If you’ve ever found yourself swooning over a pavlova – that ethereal, crisp-on-the-outside, marshmallowy-on-the-inside cloud of sweetness. you’ll know it’s basically a little slice of dessert heaven. Nigella Lawson’s Pavlova Mini is her personal, charming take on this classic treat, scaled down into dainty individual portions. I remember the first time I tried making these mini pavlovas after watching one of her shows; it felt like I was creating edible little works of art, each with its own personality. These aren’t just pavlovas; they’re little celebrations. perfect for parties or when you just want to treat yourself without committing to a giant dessert.
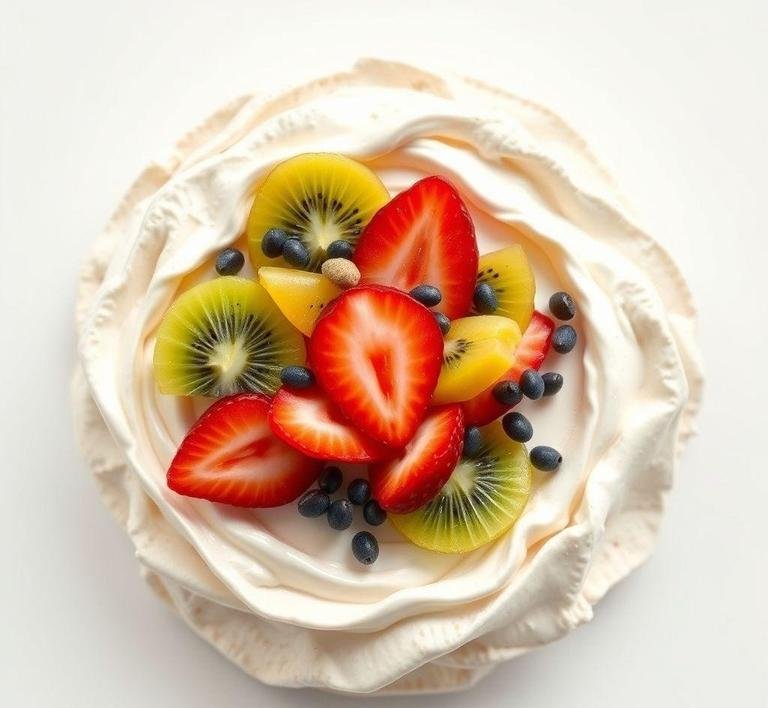
What’s wonderful about Nigella’s version is how she embraces simplicity and elegance all at once. Each mini pavlova starts with the same basic ingredients as a traditional pavlova but is shaped into petite nests. These little nests cradle whipped cream and fresh fruit, transforming them into something that feels both indulgent and light. I’ve found these mini pavlovas make gatherings so much more special. it’s like giving everyone their own personal cloud of sweetness and watching them dig in with delighted smiles never gets old.
Nigella Pavlova Mini Recipe
Ingredients Needed
When you peek into Nigella’s pantry for this recipe, you’ll find it’s refreshingly straightforward. Here’s what you need:
- 4 large egg whites. This is the soul of your pavlova and separating them carefully is key.
- 200 grams (about 1 cup) caster sugar. Finer sugar dissolves more easily, giving you that smooth, glossy meringue.
- 1 teaspoon white wine vinegar. This adds a subtle tang that helps stabilize the meringue.
- 1 teaspoon cornflour – A tiny secret weapon that keeps the meringue soft and marshmallowy inside.
- A pinch of salt. Just enough to balance the sweetness.
- 300 ml double cream. Whipped into fluffy clouds to fill your pavlova nests.
- Fresh fruit for topping. Think strawberries, kiwi, passion fruit or whatever is in season and makes your heart sing.
I remember one summer when I went a little wild with the fruit-blueberries, raspberries and even some edible flowers. It was such a fun, colorful twist that made the pavlovas look like little garden treasures.
Equipment Needed
One of the things I love about this recipe is that it doesn’t demand a fancy kitchen. Here’s what will get you through:
- Mixing bowls – At least two: one for egg whites, one for whipping cream.
- Electric whisk or stand mixer. Unless you have ninja arm strength, this tool is your best friend to get those egg whites to stiff peaks.
- Baking tray – A flat, sturdy one.
- Parchment paper – To keep your pavlovas from sticking and to help shape the nests.
- Spoon or piping bag. For shaping those elegant little pavlova nests.
- Spatula – To gently fold in ingredients and help with spreading.
I remember my first attempt when I didn’t have a piping bag. I used a spoon and my hands to shape the nests which was a bit messy but oddly satisfying. It taught me that sometimes imperfection brings charm!
Instructions To Make Nigella Lawson’s Pavlova Mini
Here’s the full play-by-play – like I’m right there with you in the kitchen, cheering you on.
- Preheat your oven to 120°C (about 250°F). Low and slow is the way for pavlovas.
- Beat the egg whites: Start whisking your egg whites in a clean, dry bowl. This takes patience – I usually play some good tunes to keep myself motivated. Whisk until soft peaks form.
- Add sugar gradually: Slowly sprinkle in the caster sugar, a tablespoon at a time. Keep whisking after each addition. The mixture should become glossy and stiff, with the sugar fully dissolved. You can test this by rubbing a little of the meringue between your fingers. no grit means you’re golden.
- Fold in the vinegar, cornflour and salt: Using a spatula, gently fold these in. They’re what give your pavlova its signature texture. crisp shell, marshmallow center.
- Shape the pavlovas: Line your baking tray with parchment. Using a spoon or piping bag, dollop or pipe 8-10 small nests, leaving a slight well in the center for your cream and fruit.
- Bake for about 1 hour: The pavlovas will be crisp on the outside. Turn off the oven and leave them to cool inside for at least an hour (overnight is even better). This step is crucial. it lets them dry out perfectly without cracking.
- Whip the cream: When you’re ready to serve, whip the double cream to soft peaks. Spoon or pipe it generously into each nest.
- Top with fresh fruit: Scatter your choice of fruits on top and for a final flourish, maybe a little drizzle of passion fruit pulp or a sprinkle of icing sugar.
The first time I baked these, I was so nervous about getting the meringue just right. But when I pulled them out, golden and perfect, I felt like I’d unlocked a little baking secret. The moment of serving, watching everyone’s faces light up – pure joy.
What I Learnt
Making Nigella Lawson’s Pavlova Mini taught me a lot more than just how to bake a dessert. It’s about patience and attention to detail. You can’t rush a pavlova; it’s a lesson in gentle, slow cooking and trust. I learned how to read the texture of meringue, how to balance sweetness with acidity and how a few simple ingredients can come together to create something extraordinary.
Also, the joy of sharing these mini pavlovas reminded me how food is deeply tied to connection. It’s not just about the dessert itself but the stories you build around it, the laughter and smiles it inspires. That’s the real magic.
FAQs
How Do I Make Nigella Lawson’s Pavlova Mini Recipe Without The Meringue Cracking?
Great question! The trick with mini pavlovas is making sure your meringue mixture is well-beaten and stiff. When you whip your egg whites, go slow and steady-no rush. You want those peaks to hold strong! Also, make sure your oven is at a low temperature (around 140°C / 275°F) and let the pavlovas cool down completely in the oven after they bake. That’ll help prevent cracking. If you’re anything like me, you’ll love how each little one turns out perfectly crisp on the outside and marshmallowy on the inside!
Can I Add Different Toppings To Nigella’s Mini Pavlova Recipe?
Absolutely! The beauty of pavlova is its versatility. While Nigella’s recipe calls for whipped cream and berries, you can totally mix it up. Think passion fruit, kiwi, or even a drizzle of salted caramel. One time, I added crushed pistachios and it took it to the next level. You can’t go wrong with a good combo of fresh fruits and something crunchy or tangy to balance out the sweetness!
Can I Prepare Nigella’s Pavlova Minis Ahead Of Time?
Yes, you can! I love making the meringue bases the day before and storing them in an airtight container. Just make sure they’re completely cool before you store them, or they might get a little soggy. The whipped cream and toppings are best added right before serving, though, so the cream stays fresh and the pavlova doesn’t lose its crunch. It’s a total crowd-pleaser and one of those desserts that feels fancy but is actually pretty easy to pull off!