I first stumbled across Nigella Lawson’s gluten free chocolate brownies on a whim when a dear friend of mine, who’s gluten intolerant, invited me over for tea. I wanted to bring something that felt indulgent, comforting and decidedly chocolatey without worrying about her dietary restrictions. Nigella’s recipe came highly recommended and boy, did it deliver.
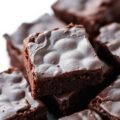
These brownies aren’t just your average gluten free snack. They’re rich, fudgy and carry that intense chocolate punch that makes you pause whatever you’re doing and just savor the moment. Unlike many gluten free treats that can be dry or crumbly, Nigella’s brownies have this wonderfully dense, almost chewy texture, thanks to her clever use of ingredients and technique.
To me, these brownies are like a cozy hug on a rainy afternoon. satisfying, warm and utterly addictive. And the best part? They’re simple enough for a midweek bake but fancy enough to bring to a party and wow your friends.
Nigella Gluten Free Chocolate Brownies Recipe
Ingredients Needed
When I first gathered everything for this recipe, I was surprised by how straightforward it was. There’s no need for fancy gluten free blends or hard-to-find items – just simple pantry staples that come together to create magic:
- Dark chocolate (about 200g). I like to use a good quality 70% cocoa bar for that deep, bittersweet flavor.
- Butter (about 175g) – Unsalted, because you can control the salt later if you want.
- Caster sugar (300g) – It gives the perfect sweetness without overpowering the chocolate.
- Eggs (3 large) – These help with the structure and that slightly gooey middle I adore.
- Gluten free plain flour (75g). The star here that keeps it gluten free without compromising on texture.
- Cocoa powder (40g) – For that extra chocolate kick and richness.
- Salt (a pinch) – Because salt is the secret superhero in any chocolate recipe, bringing all the flavors to life.
- Optional: vanilla extract or espresso powder. I sometimes add a splash of vanilla or a teaspoon of espresso powder to deepen the chocolate notes even more.
What I loved about this list is how accessible it was. I didn’t have to hunt down anything exotic. the kind of ingredients you probably already have hiding in your kitchen.
Equipment Needed
This is where the charm of Nigella’s recipe shines through: minimal fuss, maximum reward. Here’s what I usually pull out of my cupboards to make these brownies:
- Mixing bowls – Just one or two will do; I keep it simple.
- Saucepan – For melting the chocolate and butter gently, using a double boiler method or just low heat on the stove.
- Whisk or wooden spoon. To mix everything until beautifully combined.
- Measuring cups and spoons. Precision matters a bit here, especially with the flour and cocoa.
- Baking tin – I use an 8×8 inch square tin lined with parchment paper. The parchment is a game-changer – it makes lifting the brownies out of the pan a breeze.
- Cooling rack – Because patience is key and cooling the brownies just right helps them set perfectly.
I remember the first time I made these, I improvised a bit. using a glass baking dish because I didn’t have the perfect square tin. It worked fine but the edges were a little different. Lesson learned: the right tin really does make a difference.
Instructions To Make Nigella Lawson’s Gluten Free Chocolate Brownies
Here’s the process that always feels like a small, delicious ritual to me:
- Preheat your oven to 180°C (350°F). I find it helps to have everything ready before you start melting chocolate and butter.
- Melt the chocolate and butter together. I do this gently over a low heat or in a heatproof bowl over simmering water. Watching the chocolate swirl into the butter and become silky is oddly satisfying. Once smooth, I take it off the heat to cool slightly.
- Beat the sugar and eggs together. I whisk them until the mixture becomes pale and a bit fluffy. it takes a few minutes but it’s worth it. This step helps the brownies have that perfect crumb.
- Fold the chocolate-butter mixture into the eggs and sugar. Slowly, gently, so you don’t lose all that air you just whipped in.
- Sift in the gluten free flour, cocoa powder and salt. I always sift to avoid lumps and to keep the texture light.
- Gently fold the dry ingredients into the wet. Here, I’m careful not to over-mix; just enough to combine everything.
- Pour the batter into your lined tin and smooth the top. I usually tap the tin lightly on the counter to release any air bubbles.
- Bake for about 25 minutes. I keep an eye on it because ovens vary. The edges should be set but the center still a bit soft and gooey. That’s the sweet spot.
- Cool completely in the tin before slicing. This is the hardest part – patience! But it helps the brownies cut cleanly and hold their shape.
The first time I made them, I couldn’t wait and cut into them too soon. The texture was more like a molten chocolate puddle. delicious but messy. Waiting made all the difference.
What I Learnt
Making Nigella Lawson’s gluten free chocolate brownies was an eye-opener for me in more ways than one. I’ve baked plenty of gluten free treats before and many times they’ve been disappointing. crumbly, dry or bland. But this recipe taught me that gluten free doesn’t mean flavor-free or sad.
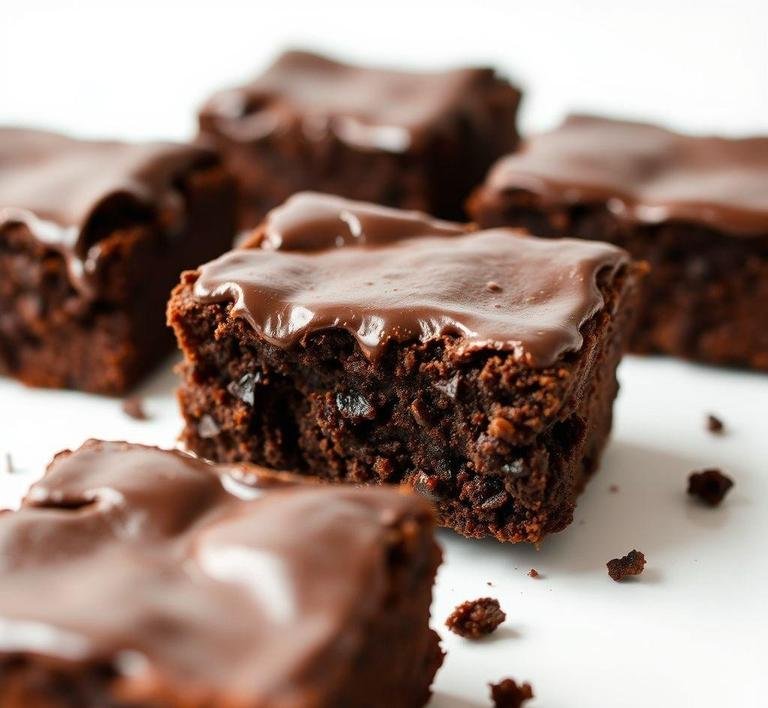
The careful balance of butter, sugar, eggs and the right flour blend creates something indulgent, chewy and chocolate-packed without needing any gluten. The cocoa powder adds richness and the slight bitterness of dark chocolate balances the sweetness perfectly.
Also, the texture – fudgy but not too dense. is proof that gluten free baking can be just as satisfying as traditional baking. It’s all about respecting the ingredients and taking the time to let them come together.
Most importantly, it reinforced that food is more than just sustenance. Baking these brownies for my friend made me realize how food connects us, how it can be an act of love, especially when we’re mindful of others’ needs.
FAQs
Can I Substitute Any Ingredients In Nigella’s Gluten-free Chocolate Brownies Recipe?
Absolutely! If you’re out of a specific ingredient, don’t panic. You can swap the gluten-free flour blend with almond flour for a richer, nuttier texture, or even try coconut flour if you’re into that coconutty twist. I’ve done both, and they turn out great, though coconut flour absorbs more liquid, so keep an eye on the consistency. You can also play around with the sugar, maybe using coconut sugar for a lower glycemic index!
How Can I Make Nigella’s Gluten-free Chocolate Brownies Dairy-free?
Easy! You can swap out the butter for a dairy-free alternative like coconut oil or a good-quality plant-based butter. I personally like using vegan margarine when I make them for friends who are dairy-free-it still gives them that richness without losing the brownie vibe. Just make sure your chocolate is dairy-free too (I recommend 70% dark chocolate for that deep flavor).
What’s The Best Way To Store Nigella’s Gluten-free Chocolate Brownies So They Stay Fresh?
Honestly, these brownies don’t last long at my house because everyone devours them within a day or two. But if you’re looking to store them, keep them in an airtight container at room temperature. They’ll stay good for about 3-4 days. For longer storage, you can freeze them, and they’ll still taste pretty amazing after defrosting. Just make sure you wrap them tightly, so they don’t dry out.