There’s something about Nigella Lawson’s recipes that always feels like she’s inviting you into her kitchen for a cozy, indulgent experience. Her Chocolate Pear Pudding is one of those desserts that can turn an ordinary evening into something special. It’s a decadent mix of dark chocolate, luscious, ripe pears and a delicate, almost fudgy texture. The warmth of the chocolate and the tender juiciness of the pears create this magical contrast that is pure comfort food. When I first made it, I had this moment where I realized: this isn’t just a dessert, it’s an experience. It’s the kind of dish that feels like a hug on a plate. The richness of the chocolate pairs beautifully with the pears, making it a perfect dessert for fall or winter-though honestly, I’d happily make it year-round!
What’s so genius about this recipe is how simple it is to put together. You don’t need any fancy skills or obscure ingredients. But what you do get is a dessert that looks and tastes like you’ve spent hours in the kitchen, when in reality, it’s pretty straightforward. It’s one of those recipes that feels like it’s meant to be shared-ideal for a dinner party or for when you just want to treat yourself.
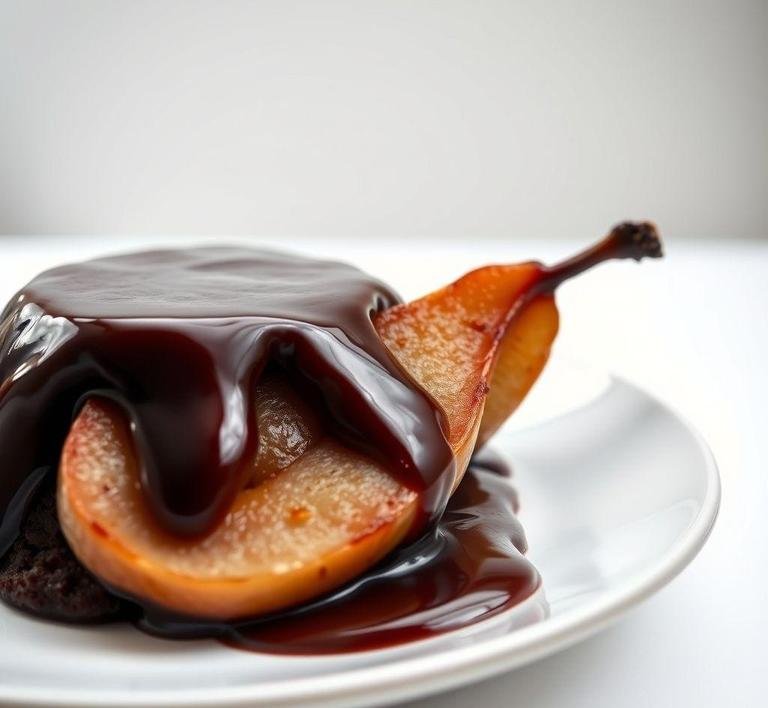
Nigella Chocolate Pear Pudding Recipe
Ingredients Needed
I’ve always loved that Nigella’s recipes often don’t require you to chase down odd, hard-to-find ingredients. You probably already have most of these in your pantry and the rest can be picked up easily in any grocery store. Here’s the breakdown:
- Pears: The recipe calls for ripe pears. The type of pear matters, too. You’ll want ones that are juicy but firm enough to hold their shape when baked. I’ve used both Bartlett and Comice pears and both work beautifully.
- Dark Chocolate: Nigella recommends a high-quality dark chocolate (around 70% cocoa) for the best depth of flavor. Trust me on this one-using good chocolate really makes a difference.
- Butter: This is a pudding, after all! The butter adds richness to the batter and it helps the pudding have that melt-in-your-mouth consistency.
- Sugar: A mix of caster sugar (for smoothness) and brown sugar (for a little depth of flavor) is perfect here.
- Eggs: The eggs bind everything together and create the beautiful, slightly gooey texture when baked.
- Self-raising flour: It gives the pudding just the right amount of lift without being too cake-like.
- Baking powder: A little extra boost to ensure the pudding rises properly.
- Vanilla extract: A hint of vanilla enhances the flavors of the chocolate and pears without overwhelming them.
- Salt: A pinch of salt in desserts always makes a difference. It helps balance out the sweetness and brings out the chocolate’s richness.
You might also need some extra pears if you’re feeling like being extra generous with the fruit (I totally recommend this) and a bit of double cream or ice cream for serving. That’s the final touch. a silky scoop of cream to complement the warmth of the pudding.
Equipment Needed
When it comes to Nigella’s recipes, you don’t need anything too fancy but having the right equipment makes the process much smoother. Here’s what you’ll need:
- A large mixing bowl: To combine your dry ingredients, wet ingredients and the chocolate mixture.
- A heatproof bowl: To melt the chocolate (I usually just use the microwave but you could also use a double boiler if you’re feeling more traditional).
- A whisk or electric mixer: To beat the butter, sugar and eggs into the right texture.
- A saucepan: To melt the butter and chocolate together (you could use the microwave for this but the saucepan feels more luxurious and gives you that lovely scent in the kitchen).
- A 23 cm (9-inch) round cake tin or a deep baking dish: This is where the magic happens, so make sure it’s greased well.
- A spoon or ladle: To scoop the batter into the tin and spread it out evenly.
That’s really it. Nothing too crazy, just the basics.
Instructions To Make Nigella Lawson’s Chocolate Pear Pudding
Alright, let’s get into the fun part! The first thing that’s so comforting about this recipe is how simple it is, yet how indulgent it feels. Here’s how you can recreate that cozy, mouthwatering moment at home.
- Preheat the oven to 180°C (350°F). Grease your cake tin generously and line the base with parchment paper. This just makes sure everything comes out without any drama.
- Melt the chocolate and butter. Gently heat the butter and chocolate together in a saucepan over low heat. Stir occasionally and soon you’ll have a smooth, glossy mix. Don’t rush this step. let the butter melt gently so the chocolate doesn’t seize up. I always end up tasting this part and end up having to stop myself from eating it all before it even reaches the pudding.
- Whisk together the sugar and eggs. In a large bowl, beat the eggs and sugars together. You want to get this nice and fluffy. I love this step because it’s when everything starts to feel like it’s coming together. The mix should be light and airy.
- Add the chocolate mixture to the eggs and sugar and whisk it all together. You’ll notice it deepening in color and becoming beautifully glossy.
- Sift the dry ingredients. In another bowl, sift together the flour, baking powder and salt. Then fold this into the chocolate mixture until just combined. Don’t over-mix-this is key to keeping the pudding soft and gooey in the middle.
- Prepare the pears. Peel the pears, cut them in half and remove the cores. I like to slice them into thin wedges but you can keep them in halves if you prefer bigger chunks of pear in the pudding.
- Layer the pears in the bottom of the greased tin. Pour the batter over the pears. The batter will rise around the pears but they’ll stay nestled in the pudding, making every bite a delightful mix of chocolatey goodness and pear juiciness.
- Bake for about 45 minutes or until the pudding is set but still slightly wobbly in the center. It’s one of those dishes where the true magic happens once you cut into it and see that gooey, chocolate-filled interior.
- Let it cool for a few minutes before serving. I can never wait too long before cutting into it, though. It’s a test of willpower.
What I Learnt
Making Nigella’s Chocolate Pear Pudding taught me a few key things about baking. and about how food has the power to create memories. First, the simplicity of this recipe is deceptive. It feels like you’re doing something intricate but really, the key is in using the best quality ingredients. The chocolate and pears are the stars here and if you don’t rush the process, you’ll create something incredible.
Also, I’ve come to realize that some desserts just hit different when they’re served warm. The gooey center of this pudding is so comforting. it’s like it gives you a little bit of joy with every bite. And the pears? Honestly, they bring this fresh, juicy contrast to the richness of the chocolate that I didn’t expect but completely fell in love with.
Lastly, I’ve learned that Nigella’s recipes are the perfect balance of decadence and ease. This is a dessert that feels like a showstopper but doesn’t require a ton of effort or expertise to get right. That’s part of the reason I keep coming back to her recipes. she makes you feel like a pro in the kitchen without all the stress.
FAQs
What Makes Nigella Lawson’s Chocolate Pear Pudding So Special?
Oh, it’s the perfect balance of rich chocolate and soft, juicy pears. The chocolate part is indulgently gooey, while the pears soak up all that decadent flavor. It’s a bit like a warm hug in dessert form-satisfying, yet comforting, especially when paired with a dollop of cream or vanilla ice cream.
Can I Use Any Type Of Pear For This Pudding?
You can technically use any pears, but for the best results, go for a variety that holds its shape when cooked, like Bosc or Conference pears. I’ve tried it with other varieties, and the texture just wasn’t the same-too mushy, you know? The pears need to retain some firmness to stand up to the chocolatey richness.
How Can I Make Nigella’s Chocolate Pear Pudding Ahead Of Time?
Definitely! It’s one of those desserts that gets even better after a bit of rest. You can prep the whole thing, refrigerate it, and bake it just before serving. If you want to take it a step further, bake it, let it cool, and reheat it gently in the oven. The flavors meld even more beautifully this way!