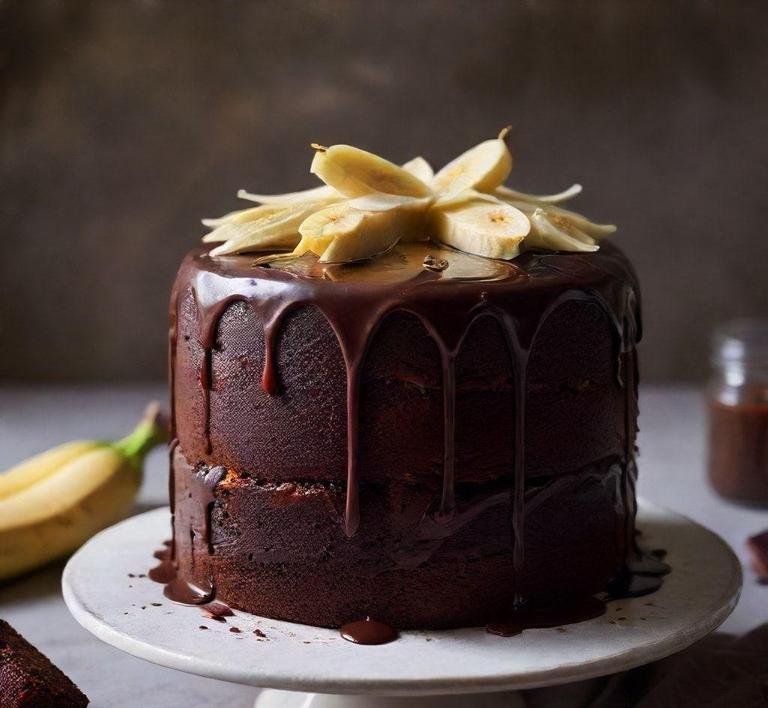
Nigella Lawson’s Chocolate and Banana Cake is one of those recipes that feels like a warm hug in dessert form. It’s rich, moist and effortlessly indulgent, combining the sweet, familiar comfort of bananas with the luscious depth of chocolate.
When I first came across this cake, I was instantly intrigued by the pairing of bananas and chocolate but what really made me excited was the simplicity of the recipe. It’s like Nigella invited you into her kitchen, sat you down with a cup of tea and said, ’Here”s something I love to make for my friends and family”. There’s nothing fussy about it. The bananas keep the cake moist while the dark chocolate gives it just the right amount of richness.It’s a cake you could throw together on a whim.
The bananas aren’t just a filler. they really shine through in both flavor and texture. The cake’s simple, comforting nature makes it the perfect recipe to bake when you’re craving something nostalgic and indulgent.
Nigella Chocolate And Banana Cake Recipe
Ingredients Needed

Here’s where things get real easy. The beauty of this recipe is that you don’t need a bunch of exotic ingredients or a pantry full of complex baking supplies. You probably have most of these things already, tucked away in your kitchen. It’s all about simplicity and allowing the natural flavors to come through.
- 3 ripe bananas: The riper, the better. Those bananas that you’ve been meaning to eat but didn’t quite get to? Perfect for this recipe. The bananas give the cake its signature moistness and natural sweetness. Don’t skip this!
- 200g (7 oz) plain flour: I’ve found that using regular all-purpose flour works just fine but make sure you sift it to avoid any lumps.
- 50g (1/2 cup) cocoa powder: Go for a good-quality cocoa powder; the flavor is so important here. Dark cocoa is the best for that deep, chocolatey vibe.
- 1 tsp baking powder: A little lift to make the cake rise just right. It won’t be a massive puffed-up cake but it’ll have a nice texture.
- 1/2 tsp baking soda: This helps with the rising process too and gives the cake that soft, light crumb.
- 1/2 tsp salt: Balances the sweetness, enhancing the banana and chocolate flavors.
- 100g (1/2 cup) unsalted butter: You can’t go wrong with butter. It makes the cake rich and gives it a lovely texture. If you’re feeling daring, you can use a bit of brown butter for added flavor.
- 100g (1/2 cup) sugar: Just a little sugar, enough to enhance the flavors but not make it too sweet. If you’re feeling like being a bit of a rebel, you can swap it for something like coconut sugar or even maple syrup (though it might slightly change the texture).
- 2 large eggs: These help bind everything together and give the cake its structure.
- 200g (7 oz) dark chocolate: The star of the show. It melts beautifully into the cake batter, creating a smooth, indulgent texture.
- 1 tsp vanilla extract: Just a touch of vanilla adds a wonderful depth of flavor, without overpowering the banana and chocolate.
- 100 ml (1/2 cup) whole milk: This helps create a smooth batter, giving the cake just the right amount of tenderness.
Equipment Needed
Now, before we get into the magic of mixing and baking, here’s what you’ll need in terms of tools. Don’t worry, it’s all standard stuff. nothing fancy needed.
- Mixing bowls: A couple of large bowls, one for dry ingredients and one for wet. I love using a big glass bowl because you can see everything coming together.
- Electric whisk or stand mixer: Sure, you could do it by hand but I’m all for making things easier. A whisk will help break up those bananas and blend everything together nicely.
- Sifter: For sifting the dry ingredients like flour, cocoa powder and baking powder. It ensures no lumps and makes sure your cake is perfectly smooth.
- Spatula: To scrape down the sides of the bowl and make sure everything’s evenly mixed.
- 8-inch round cake pan: This is the ideal size for the recipe. You could use a square one but I like the look of a round cake. Grease it and line it with parchment paper to make removal easy.
- Oven: You’ll need a well-heated oven (I like mine around 180°C / 350°F). It’s all about getting that even, golden finish.
Instructions To Make Nigella Lawson’s Chocolate And Banana Cake
Let’s dive into the fun part: baking it all together. Here’s how you can make this delicious cake, step-by-step.
- Preheat your oven: Get your oven up to 180°C / 350°F. While it’s warming up, line your cake pan with parchment paper and grease it with butter or oil.
- Mash the bananas: Grab your ripe bananas and mash them up in a large bowl. I love using a fork for this. there’s something satisfying about mashing bananas, don’t you think? You want them smooth but a few small lumps here and there won’t hurt.
- Melt the chocolate: Break up your chocolate and melt it. You can do this in a heatproof bowl over a saucepan of simmering water (double boiler method) or in the microwave. Either way, just keep an eye on it so it doesn’t burn. Once it’s melted, set it aside to cool slightly.
- Mix the dry ingredients: In another bowl, sift together the flour, cocoa powder, baking powder, baking soda and salt. This will help everything mix smoothly without clumps.
- Cream the butter and sugar: In a separate large bowl, beat the butter and sugar together until pale and fluffy. This should take around 3-5 minutes with an electric whisk. The mixture will look light and creamy.
- Add the eggs: Add the eggs, one at a time, to the butter-sugar mixture, beating well after each addition. You want to make sure it’s well incorporated.
- Combine the wet and dry: Add the mashed bananas, the melted chocolate and the vanilla extract into the butter mixture, stirring gently until combined. Slowly add the sifted dry ingredients, alternating with the milk, starting and ending with the dry ingredients. Mix gently-don’t overwork it.
- Bake: Pour the batter into your prepared pan, spreading it out evenly. Pop it in the oven and bake for about 45-50 minutes or until a skewer comes out clean when inserted into the center of the cake.
- Cool and enjoy: Once it’s done, let it cool in the pan for 10 minutes before turning it out onto a wire rack. Let it cool completely before serving (though I’ve been known to sneak a warm slice with a bit of ice cream on the side).
What I Learnt
What I learned from making Nigella’s Chocolate and Banana Cake is that sometimes, the simplest recipes are the best. There’s no need for any fancy tricks or secret techniques. just a few quality ingredients that come together in harmony. I’ve made this cake on a few different occasions now and every time it’s been met with smiles and empty plates. The texture is perfectly balanced, thanks to the bananas and the chocolate gives it that decadent edge.
The thing that always surprises me is how the cake stays so moist for days. Even after a couple of days in the fridge (if it lasts that long), it’s still just as soft and indulgent as the first bite. I’ve also experimented with different types of chocolate and I’ve found that dark chocolate gives the cake a more sophisticated taste but milk chocolate works well for a sweeter, more comforting vibe.
One more thing: if you’re feeling a little extra, a drizzle of chocolate ganache on top is never a bad idea.
FAQs
Can I Use Overripe Bananas For Nigella Lawson’s Chocolate And Banana Cake?
Absolutely! In fact, overripe bananas are perfect for this cake. The extra sweetness and moisture they bring will make the cake even more delicious. It’s one of those recipes where the riper, the better!
Do I Have To Use Cocoa Powder, Or Can I Substitute Something Else?
Nigella’s recipe really shines with unsweetened cocoa powder because it gives the cake that deep, rich chocolate flavor. But if you don’t have cocoa powder on hand, you could try using melted dark chocolate instead, just make sure to reduce the other liquid in the recipe slightly.
Can I Make Nigella’s Chocolate And Banana Cake In Advance?
Yes, you totally can! In fact, the cake actually tastes even better the next day once all the flavors have had time to mingle. Just store it in an airtight container and it will keep for a couple of days. It’s the kind of cake you can make ahead and still impress your guests with!


