Nigella Lawson’s Blackberry Jam is more than just a sweet treat; it’s a celebration of the seasons. If you’ve ever wandered into the woods or explored a hedgerow in late summer or early autumn, you’ve probably spotted those deep purple-blackberries, glistening in the sunlight, waiting to be picked. The sight of them always brings me back to childhood. There’s something magical about picking fruit from nature and transforming it into something so comforting, so homey.
When Nigella decided to make a blackberry jam, she didn’t just take the conventional route of just sugar and fruit. Instead, she added a twist with a splash of orange juice and zest which infuses the jam with a citrusy zing that balances the deep, rich flavor of the blackberries. It’s vibrant, it’s indulgent and there’s a bit of sunshine in every jar. What’s fascinating about her recipe is how easy it is to recreate at home, yet it feels so luxurious once it’s ready to spread over toast or dolloped onto a bowl of Greek yogurt.
In her classic style, Nigella’s recipe feels effortless while still offering depth of flavor. There’s no complicated equipment involved and you don’t have to be a seasoned cook to pull it off. It’s one of those recipes that feels special even though it’s something you can make on a lazy Sunday afternoon.
Nigella Blackberry Jam Recipe
Ingredients Needed
If you’ve ever been intimidated by jam-making, you’ll be pleased to know that this recipe doesn’t call for anything out of the ordinary, just simple ingredients you probably already have in your pantry. The blackberries are the star, of course but there are a few supporting players to really bring out their flavor.
Here’s what you’ll need:
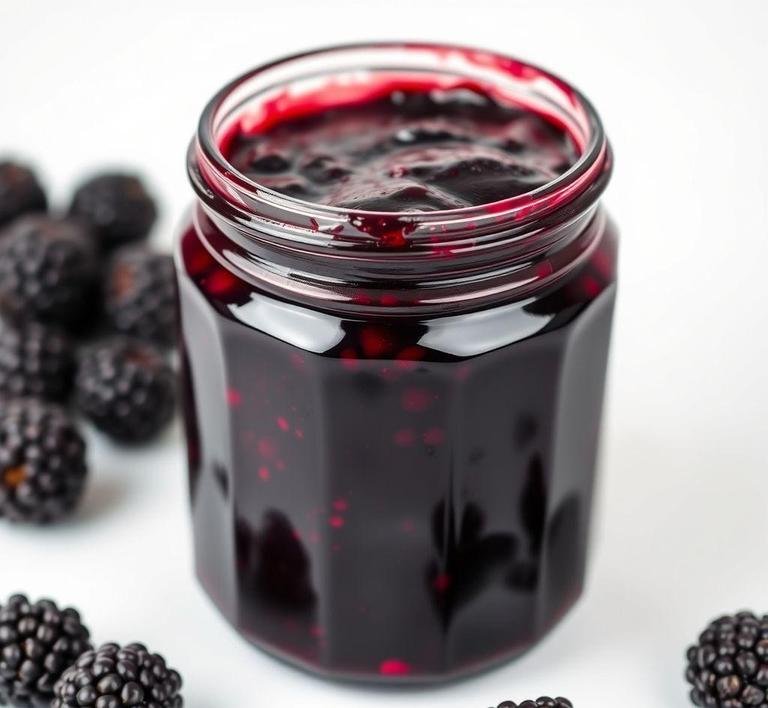
- Blackberries (1kg) – This is where the magic happens. You want fresh, ripe blackberries, bursting with juice and flavor. If you have access to wild blackberries, that’s even better! Their natural tartness makes for a more interesting jam.
- Sugar (800g) – This balances the tartness of the blackberries and helps preserve the jam. You could use jam sugar if you like but regular granulated sugar does the job perfectly.
- Fresh orange juice (1/2 cup). This is Nigella’s secret ingredient. The citrusy acidity brightens up the deep berry flavor and the zest adds a bit of fragrance.
- Orange zest (1 orange). Just a teaspoon of zest goes a long way. It adds this fragrant, zesty note that lifts the entire jam.
- Lemon juice (1 tbsp). A little extra acid to balance the sweetness.
- A pinch of salt. Just a touch, because salt has this uncanny ability to heighten sweetness in a way you wouldn’t expect.
Equipment Needed
Making jam is one of those things where the right tools really help but nothing overly fancy is required. No need to stress over having specialized jam jars or cooking equipment. Here’s what you’ll need:
- A large saucepan or jam pan. Ideally, you want something with a heavy bottom to avoid burning but really any large, wide saucepan will do.
- A wooden spoon – This will help you gently stir the jam without it sticking to the bottom.
- A potato masher or a fork. For mashing those blackberries if you prefer a smoother jam.
- A ladle or spoon for jar filling. You’ll want to have something easy to scoop the hot jam into jars.
- Sterilized jars – I can’t stress this enough! Clean jars will ensure the jam lasts longer without spoiling. You can sterilize them by washing in hot soapy water, then putting them in a warm oven for a few minutes or by boiling them.
- A candy thermometer (optional). This is helpful if you want to make sure your jam reaches the correct set point but it’s not a must. You can also test the jam’s setting point with the classic ’wrinkle test’ on a chilled plate.
Instructions To Make Nigella Lawson’s Blackberry Jam
Okay, now for the fun part-actually making the jam. There’s something therapeutic about watching fruit transform into something thick and glossy. Here’s how you’ll do it:
- Prepare the blackberries: Rinse the blackberries gently under cold water and then place them in a large, wide saucepan. You don’t need to cut them up; just let them tumble in whole as they’ll break down beautifully when cooked.
- Cook the berries: Put the saucepan over medium heat, allowing the blackberries to release their juices. After about 5-10 minutes, you’ll notice the berries beginning to soften. Gently mash them with a potato masher or fork. You can leave it a little lumpy or go for a smoother texture, depending on your personal preference.
- Add the sugar and citrus: Stir in the sugar, orange juice, orange zest, lemon juice and a pinch of salt. Continue to stir until the sugar completely dissolves. Don’t rush this step. it’s crucial for ensuring the right texture and flavor.
- Bring to a boil: Turn up the heat and bring the mixture to a boil. Once it’s boiling, reduce the heat slightly so it’s still bubbling gently. Keep stirring occasionally to avoid burning the jam at the bottom. This stage will take around 20-30 minutes. You’ll start to notice the jam thickening as it cooks.
- Test the set: Now comes the tricky part (but not too tricky). After about 20 minutes, take a teaspoon of jam and place it on a chilled plate. Let it cool for a minute, then run your finger through the jam. If it wrinkles and holds its shape, it’s ready to go. If not, let it boil for a few more minutes and test again.
- Fill the jars: Once you’re happy with the set, remove the jam from the heat and spoon it into your sterilized jars. Make sure to leave a little space at the top for expansion. Seal the jars immediately.
- Cool and store: Let the jars cool completely at room temperature. You can store the jam in a cool, dark place for up to a year but once opened, it’s best to use it within a month.
What I Learnt
There’s something so grounding about making jam. For me, it’s more than just a cooking process. It’s about patience, practice and being in the moment. The first time I made Nigella’s blackberry jam, I was surprised at how easily it came together. There’s a part of you that’s always slightly nervous about jam-making-what if it doesn’t set? What if it burns? But honestly, with Nigella’s method, everything came out perfectly. The combination of orange juice and zest with the blackberries made the jam taste like summer in a jar and I felt proud of every jar I sealed.
What struck me the most was the contrast between the simplicity of the ingredients and the richness of the final product. The balance between tartness and sweetness was spot-on. If you’ve never tried making jam before, I’d say this is the perfect starter recipe. It gives you just enough confidence to explore more flavors in the future. And nothing beats that satisfaction of enjoying homemade jam with the people you care about.
FAQs
How Do I Make Nigella Lawson’s Blackberry Jam?
Making Nigella’s blackberry jam is surprisingly simple! You’ll need blackberries, sugar, and a little bit of lemon juice. Start by simmering the blackberries in a large pot until they soften and release their juices. Add sugar and lemon juice, then cook it down to a thick, glossy consistency. The best part? Nigella suggests using a jam thermometer, so you don’t have to guess when it’s ready! You’ll know it’s done when it reaches the ’setting point’-just like a professional jam maker!
Can I Use Frozen Blackberries For Nigella’s Jam Recipe?
Definitely! Frozen blackberries work just as well as fresh ones. In fact, they can sometimes release more juice when they thaw, which can help the jam set better. Just let them thaw first, and you’re good to go. I’ve tried it with both fresh and frozen fruit, and honestly, it’s hard to tell the difference in the final jam!
How Long Does Nigella Lawson’s Blackberry Jam Last?
If you’ve sealed it in jars properly, Nigella’s blackberry jam can last for up to a year in a cool, dark place. But let’s be real, it probably won’t last that long because you’ll be spreading it on everything-toast, scones, even spoonfuls straight from the jar! Once opened, it’ll keep in the fridge for around a month. But you’ll want to use it before you know it; the flavor is just that good!