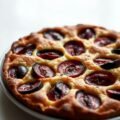
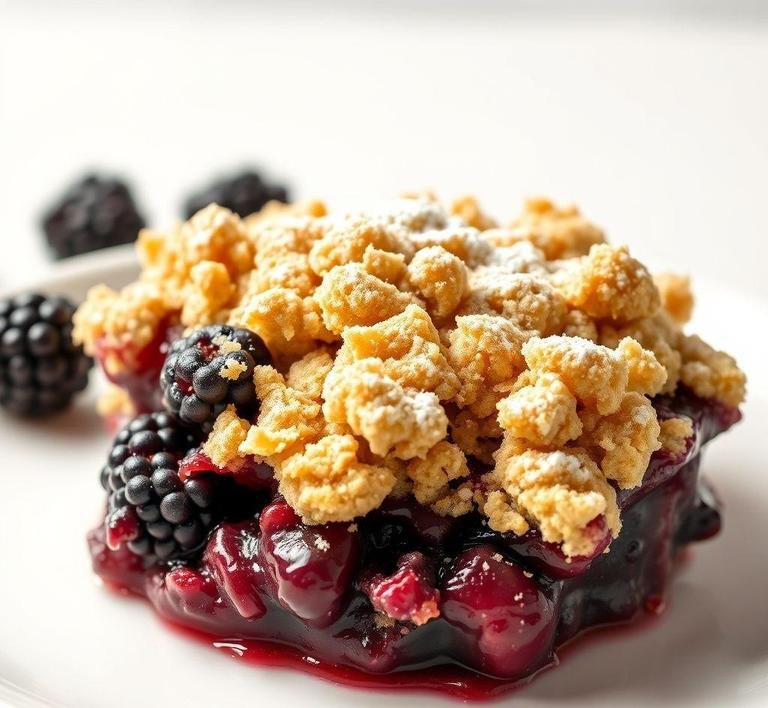
If you’ve ever found yourself craving a dessert that’s cozy, sweet and a little tangy, Nigella Lawson’s Blackberry Crisp is a perfect choice. It’s one of those dishes that feels like a warm hug, especially on cool evenings when you want something comforting and uncomplicated. Nigella is known for making food that feels indulgent without being overly fussy and this blackberry crisp is no exception. Think of it as a mix between a fruit crumble and a cobbler, where the blackberries shine, surrounded by a beautifully buttery, sweet topping.
What really stands out about Nigella’s Blackberry Crisp is how effortlessly it comes together. No complicated steps or hard-to-find ingredients. It’s the kind of dessert you can whip up on a whim when you’ve got some fresh or frozen blackberries lying around and it doesn’t even require you to be a pro in the kitchen. But despite its simplicity, the result feels like a masterpiece. It’s the balance of tart fruit and sugary crispness, all baked to golden perfection, that makes it feel like you’re being spoiled with something luxurious.
Nigella Blackberry Crisp Recipe
Ingredients Needed
So, what exactly do you need to make this incredible blackberry crisp? You might already have most of these ingredients in your pantry or fridge. Here’s the list:
- Blackberries (fresh or frozen). The star of the show. You want about 600 grams (around 1 pound and 5 ounces) of blackberries but honestly, this recipe is forgiving. You can adjust the quantity depending on how fruity you want your crisp to be. If you can find some that are sweet and ripe, go for it; if you’re using frozen, they work just as well.
- Caster sugar – This helps sweeten the fruit without making it too grainy. You can also use regular granulated sugar but caster sugar has a finer texture that blends in nicely.
- Lemon juice – A splash of lemon adds that little zing to balance out the sweetness and brings out the natural flavors of the blackberries.
- Cornflour (cornstarch) – This is used to thicken up the berry juice as it cooks, turning it into a lovely syrupy filling. If you don’t have cornflour, you can use plain flour, though cornflour works best for the desired consistency.
- Butter (unsalted) – I love how Nigella uses unsalted butter here; it gives you more control over the saltiness of the dish. You’ll need it for both the filling and the topping.
- Oats – These are key for the crunchy topping. The oats provide a satisfying chewiness that contrasts with the tender fruit.
- Brown sugar – For the topping, brown sugar adds a rich, caramel-like flavor that’s just irresistible. I honestly think this is one of the things that makes the crisp stand out.
- Plain flour (all-purpose) – This helps give the topping its structure and ensures that it crisps up beautifully.
- Ground almonds – This is Nigella’s secret ingredient, giving the topping a slight nuttiness and added texture. It’s totally optional but I think it makes the dish feel just a bit more special.
- A pinch of salt. Because salt and sugar are best friends and a little pinch in the topping really makes the sweet elements pop.
Equipment Needed
You don’t need any fancy kitchen gadgets to make this crisp which is one of the things I love about it. Here’s what you’ll need:
- A baking dish (roughly 20 x 20 cm). You’ll want something that’s shallow but not too wide, so the blackberries have a chance to bubble up and become syrupy while the topping crisps up.
- Mixing bowls – One for the filling, another for the topping. It’s nice to keep them separate so you can easily toss things together without getting them mixed up too early.
- A spoon or spatula. To stir the blackberries and gently mix the topping ingredients.
- A pastry cutter or your fingers. You’ll use this to crumble the topping ingredients together. Nigella’s method of “rubbing the butter into the flour” is just the kind of task that’s oddly satisfying, like making a messy but delicious masterpiece.
- Measuring cups and spoons. Because a little precision goes a long way when it comes to getting the balance of sweetness just right.
- An oven – I’m guessing you’ve got one of these! Preheated to about 180°C (350°F), it’ll work its magic on the crisp.
Instructions To Make Nigella Lawson’s Blackberry Crisp
Okay, let’s get baking. The best part of this recipe is how it’s all about layering the flavors and textures. It doesn’t demand much precision, so feel free to get a little messy with it!
-
Prepare the Fruit Filling:
Preheat your oven and grab your baking dish. If you’re using frozen blackberries, no need to thaw them. Toss the berries in a bit of caster sugar, a pinch of cornflour and a generous squeeze of lemon juice. The lemon will add just enough acidity to balance out the sweetness. Mix everything gently, ensuring the berries are well coated, then spread them out evenly in the dish.
-
Make the Topping:
Now comes the fun part: making the crunchy topping. Combine your oats, flour, ground almonds (if using), brown sugar and salt in a bowl. Add the cold, cubed butter and either use a pastry cutter, fork or your fingers to rub the butter into the dry ingredients until you have a crumbly, almost sand-like texture. You want to see some small pea-sized pieces of butter mixed in.
-
Assemble:
Sprinkle the oat topping generously over the fruit filling. Don’t worry about making it perfectly even. it’s all about that rustic, crumbly look.
-
Bake:
Pop the dish into the oven and bake for around 40-45 minutes. You’ll know it’s done when the fruit is bubbling at the edges and the topping is golden brown. The smell while it bakes? Heavenly.
-
Cool (if you can wait):
Once it’s out of the oven, let it sit for about 10-15 minutes. I know it’s hard but the cool-down time allows the juices to settle and thicken up a bit. It also gives you the chance to prep some vanilla ice cream or whipped cream to go with it.
What I Learnt
Here’s the thing about Nigella’s Blackberry Crisp: it’s deceptively simple but also utterly satisfying. The sweetness of the blackberries combined with the slightly nutty topping is such a well-balanced flavor. What I learned (and loved) was how much the fruit filling really shines. when you give it the right amount of lemon and sugar, it doesn’t overwhelm but instead, it complements the crisp perfectly.
I also learned that this recipe can be as versatile as you like. You don’t have to just stick with blackberries. You can swap in raspberries or even a mix of summer fruits, depending on what’s in season. It also works well with a bit of cinnamon or ginger in the topping for an added spice kick. Honestly, I might experiment with adding a splash of bourbon next time, just to see how it transforms the flavor profile.
Finally, I was reminded that some of the best recipes are the ones that require minimal effort but yield maximum satisfaction. This is definitely one of those.
FAQs
Can I Use Frozen Blackberries For Nigella’s Blackberry Crisp?
Absolutely! If fresh blackberries aren’t in season or you just want to save time, frozen works perfectly. Just make sure to let them thaw a bit and drain off any excess liquid to avoid a soggy topping.
What Can I Substitute For The Oats In Nigella’s Blackberry Crisp?
If you’re not a fan of oats or just want to try something different, you can substitute with crushed almonds, pecans, or even crushed graham crackers. The texture will be a little different, but it’ll still give you that lovely crispiness!
How Do I Make Nigella’s Blackberry Crisp Ahead Of Time?
You can definitely prep this ahead of time! Assemble the crisp as per the recipe, but don’t bake it just yet. Cover it tightly with foil and pop it in the fridge for up to a day. When you’re ready, bake it off as directed. The smell when it comes out of the oven? Absolute heaven.