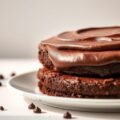
Let me take you to a moment in my kitchen that will forever be etched in my memory. It was one of those rainy afternoons, the kind where the world outside feels quiet and you find yourself craving comfort food. I came across a recipe that I hadn’t made in years but when I saw it again, my heart skipped a beat-Nigella Lawson’s Banoffee Cheesecake.
If you’ve ever had the joy of biting into a banoffee pie, you know the magic of bananas, toffee and cream. Now, imagine those flavors wrapped up in the smooth, silky decadence of a cheesecake. That’s exactly what Nigella’s recipe delivers. There’s something about her style that transforms the simplest ingredients into a celebration of comfort. It’s a cheesecake that tastes like love, like the kind of dessert you’d want to share with friends after a long, tiring day or maybe even hoard all to yourself, savoring every creamy bite.
This cheesecake doesn’t just sit there on the plate looking pretty; it invites you to experience an indulgent, layered dessert that’s somehow both rich and comforting without being overwhelming. It’s like the cake that whispers, ’Come here, let”s just take a moment”. Seriously, if you haven’t tried it yet, you’re in for a treat!
Nigella Banoffee Cheesecake Recipe
Ingredients Needed
Now, the beauty of Nigella’s Banoffee Cheesecake lies in how simple the ingredients are. There’s no list of obscure pantry items you’ll never use again. It’s all stuff you’ve probably got in your kitchen already. or if not, a quick trip to the store will sort it out.
Here’s what you need:
-
For The Base
- 200g digestive biscuits (or graham crackers if you’re in the U.S.)
- 75g butter (unsalted is ideal)
-
For The Cheesecake Filling
- 600g cream cheese (I go for full-fat, because, let’s face it, this is a treat)
- 300ml double cream (whipping cream works too)
- 75g caster sugar
- 2 ripe bananas (the riper, the better for that lovely banana flavor)
- 1 tsp vanilla extract
-
For The Toffee Topping
- 1 can (about 400g) of sweetened condensed milk (this is your shortcut to amazing toffee)
- 25g butter
- 1 tbsp dark brown sugar (for that rich, molasses-y flavor)
-
To Finish
- A little extra banana, sliced
- Grated chocolate or cocoa powder for garnish (optional but do it. you’ll thank me)
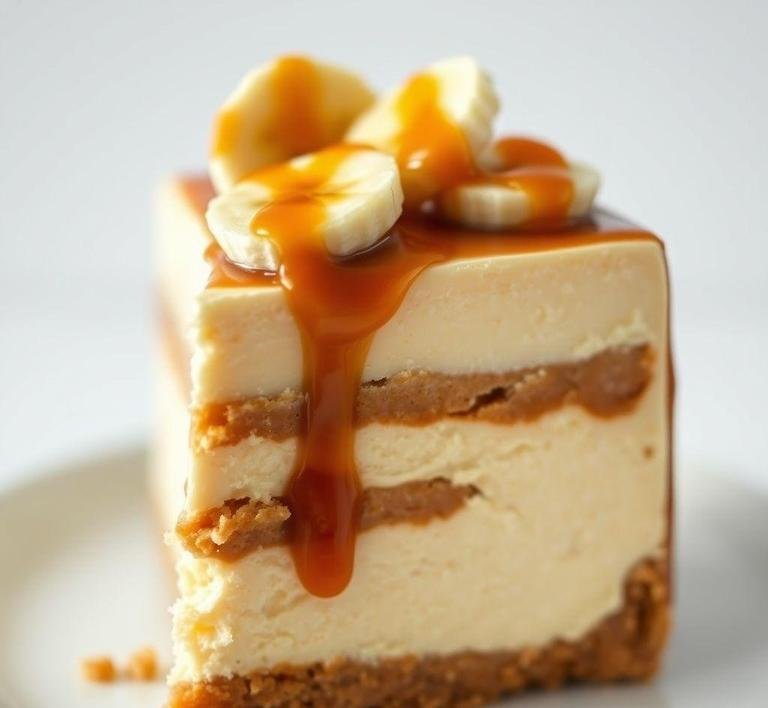
These ingredients come together to create something beautiful. You’ve got a buttery biscuit base, a creamy cheesecake filling with a hint of banana, a thick layer of gooey toffee and then the fresh banana slices that give it that perfect little touch of freshness.
Equipment Needed
Before you get to work, let’s make sure we’ve got everything. You won’t need any fancy kitchen gadgets, just the basics. trust me, even if you’re not an experienced baker, you can pull this off!
- Springform tin (23cm/9-inch): This is essential for getting that perfectly shaped cheesecake out without a meltdown. It’s worth investing in one if you don’t already have it. A regular cake tin might work but the springform gives you that lift.
- Food processor or a rolling pin: For crushing the digestive biscuits. If you don’t have a food processor, a rolling pin and a plastic bag will do just fine. Smash away!
- Electric mixer: I swear by my hand mixer for this. It makes mixing the cream cheese and double cream super easy. You can also use a stand mixer if you have one. If not, a whisk and a little elbow grease will work but it’s going to take a while.
- Saucepan: For melting the toffee ingredients together. A small, heavy-bottomed pan works best to keep the heat consistent.
- Spatula: For smoothing out the cheesecake filling and toffee.
- Chopping board & knife: For those fresh banana slices that top it all off.
Instructions To Make Nigella Lawson’s Banoffee Cheesecake
Ready to get your hands a little dirty (in the best way possible)? Here’s how you’ll pull this beauty together.
-
Start With The Base
- Blitz the digestive biscuits in your food processor until they resemble fine crumbs. If you’re old-school like me, pop them in a bag and bash away with a rolling pin. it’s strangely therapeutic.
- Melt the butter in a pan or microwave and then mix it with the biscuit crumbs. You’re aiming for a texture that holds together when pressed, like wet sand.
- Press the mixture into the base of your springform tin, making sure it’s compact and even. You can use the back of a spoon to press it down nicely.
- Chill the base in the fridge for at least 30 minutes to set.
-
Make The Toffee
- This step is like magic. Pour the condensed milk, butter and brown sugar into a saucepan over medium heat. Stir constantly until the sugar dissolves and then let it simmer for about 5-7 minutes. You’ll notice it thickening up and turning a beautiful golden caramel color.
- Once it’s done, take it off the heat and let it cool for a bit. This toffee sauce is rich, glossy and delicious-try not to eat it all by the spoonful while you’re waiting!
-
Whip Up The Cheesecake Filling
- In a large bowl, beat together the cream cheese and sugar until smooth. You can do this by hand but an electric mixer is going to make your life easier.
- Add the double cream and vanilla extract and continue to whip until it forms soft peaks. You want it thick and fluffy but still smooth. Be careful not to overwhip, though. you’re not making whipped cream, just a luscious filling.
-
Assemble
- Take the chilled base out of the fridge and layer the toffee sauce over it. Don’t be shy with it-spread it out evenly and make sure it reaches all corners.
- Slice the ripe bananas and arrange them on top of the toffee. You want enough banana to make each bite balanced.
- Spoon the cheesecake mixture over the bananas, spreading it evenly. Smooth the top with a spatula.
- Refrigerate for at least 4 hours but overnight is best. This allows the flavors to settle and the cheesecake to firm up perfectly.
-
Garnish And Serve
- When you’re ready to serve, slice up the rest of the banana and arrange the slices on top.
- For an extra touch, grate a little chocolate over the top or dust it with cocoa powder if you’re feeling fancy.
What I Learnt
Making Nigella’s Banoffee Cheesecake was a lesson in the art of indulgence. without the guilt. It’s one of those recipes that doesn’t require hours of complicated techniques but still delivers something that feels special.
The real magic is in the balance. The rich toffee, creamy cheesecake and ripe bananas come together in a way that’s somehow familiar but still surprising. And it’s such a great dessert to prepare ahead of time; you can throw it in the fridge and not worry about it until it’s time to serve. That’s what I love about it-there’s no last-minute scrambling.
I also learned the power of patience. The cheesecake needs to chill for a few hours and in a world where instant gratification is the norm, it was a reminder that some of the best things in life-like this cheesecake-are worth the wait.
FAQs
Can I Make Nigella Lawson’s Banoffee Cheesecake Ahead Of Time?
Definitely! In fact, this cheesecake is one of those desserts that tastes even better after a day or two. I love making it the night before a dinner party – it lets all the flavors meld together. Just be sure to store it in the fridge and give it a few minutes to come to room temperature before serving for the best texture.
Can I Substitute The Digestive Biscuits In Nigella’s Banoffee Cheesecake Recipe?
Yes, you can! While the digestive biscuit crust is classic, I’ve swapped them out for graham crackers before, and even ginger biscuits for a bit of extra spice. Just keep the base ratio similar, and you’ll be fine. It’s all about personal preference, so feel free to get creative with it!
How Do I Prevent The Banoffee Cheesecake From Cracking?
Ah, the dreaded crack! I’ve had my fair share of those, trust me. To prevent cracks, make sure your cheesecake bakes at a low temperature (like Nigella suggests), and once it’s done, turn off the oven and leave the door slightly ajar for about an hour. This gradual cooling process helps prevent sudden temperature changes, which are usually the culprits behind cracking. Patience is key!