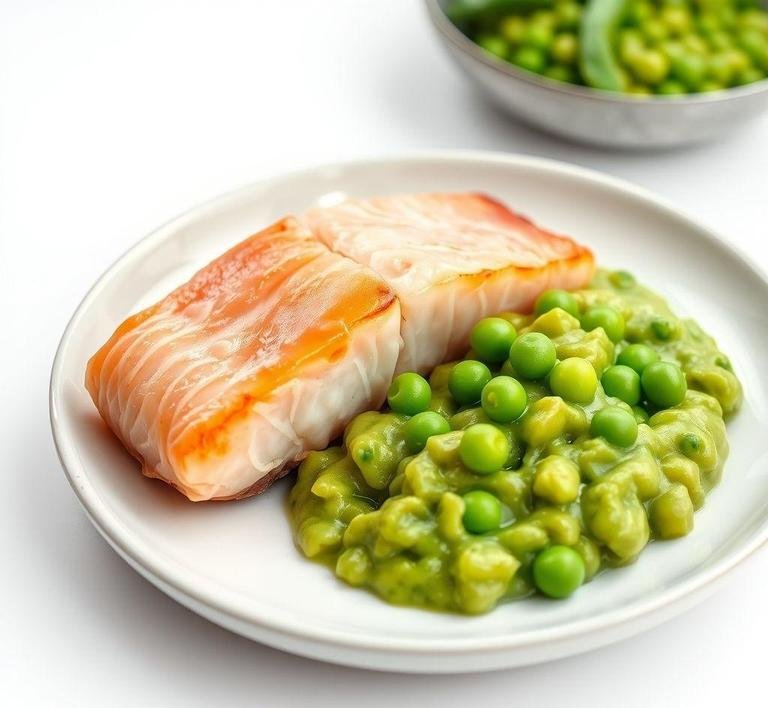
If you’ve ever found yourself craving something comforting, a little nostalgic but still elegant enough to impress, Nigella Lawson’s Salmon and Mushy Peas might just be the dish to answer that call. It’s the kind of meal that feels like a warm hug from the inside. Picture flaky, tender salmon – rich and buttery – paired with mushy peas that are vibrant and fresh, yet creamy and indulgent all at once.
Growing up, mushy peas always reminded me of seaside fish and chip shops, a quintessential British comfort food staple. But Nigella’s version elevates this classic with her signature flair. it’s fresh, simple and just a bit luxurious. Her salmon is typically cooked to perfection, moist and flaky while the peas retain that nostalgic softness but are brightened up with a little zing from fresh herbs or lemon. It’s a humble meal but one that feels special because of how each component respects the ingredients.
When I first tried making this, I remember thinking, “Could mushy peas really be this delicious at home”? And yes, they are. Nigella’s recipe transformed what I thought was a simple side into a star on its own. The beauty of this dish is in its simplicity. fresh ingredients, minimal fuss, maximum flavor.
Nigella Salmon And Mushy Peas Recipe
Ingredients Needed
The beauty of Nigella’s Salmon and Mushy Peas lies in how straightforward the ingredients are, yet how powerful they become together. Here’s what you’ll want:
- Fresh salmon fillets – skin on if you can, it crisps up beautifully and adds so much flavor.
- Frozen peas – trust me, frozen are perfect for mushy peas because they’re picked and frozen at peak freshness.
- Butter – because butter makes everything better. For both the salmon and the peas.
- Fresh mint leaves – this is key for that refreshing lift in the peas.
- Lemon – a squeeze of lemon juice brightens the whole dish.
- Salt and pepper – simple seasoning to enhance those natural flavors.
- Olive oil – for cooking the salmon with that gorgeous crisp skin.
Sometimes, Nigella adds a touch of sugar to her peas which sounds odd but balances the earthiness perfectly. I like to keep it simple but that little addition is something to try if you want to get adventurous.
Equipment Needed
This dish doesn’t require anything fancy. which is part of the charm.
- Non-stick frying pan or skillet. essential for getting that salmon skin crisp and perfect.
- Saucepan – for boiling the peas.
- Wooden spoon or potato masher. to mash the peas into that lovely mushy texture.
- Zester or grater – if you want to add some lemon zest to the peas.
- Knife and chopping board. for prepping your herbs and lemon.
- Serving plates – and maybe a glass of white wine to sip alongside.
I remember once trying to make this without a proper pan. let’s just say, salmon skin never got crispy and the peas stayed too chunky. So trust me on the pan!
Instructions To Make Nigella Lawson’s Salmon And Mushy Peas
Alright, here’s where the magic happens. Follow me closely because this is the kind of recipe where timing and care make all the difference.
- Prep your peas: Bring a saucepan of salted water to a boil and add your frozen peas. Let them cook for about 3-4 minutes until tender.
- Mash the peas: Drain them well, reserving a little cooking water. Return peas to the pan on low heat. Add a knob of butter, a few chopped fresh mint leaves, a squeeze of lemon juice and a pinch of salt. Use a wooden spoon or potato masher to gently mash them until they reach your desired consistency. If they’re too thick, splash in a bit of the reserved water to loosen.
- Cook the salmon: While the peas are cooking, heat a drizzle of olive oil in your non-stick pan over medium-high heat. Season the salmon fillets with salt and pepper. Place them skin-side down and let them cook undisturbed for about 4-5 minutes until the skin is crisp and the salmon is nearly cooked through. Flip carefully and cook for another 1-2 minutes until just done.
- Final touches: Taste your mushy peas. adjust seasoning with more lemon or mint if you like. Plate the salmon alongside a generous scoop of peas, maybe a little extra butter melting on top of the fish.
The first time I did this, I felt like I’d made something restaurant-worthy. The crispy skin, the soft peas, the hint of lemon and mint. it was exactly what I wanted. Nigella’s instructions always feel like they’re guiding you gently by the hand, reminding you to trust your instincts.
What I Learnt
Making this dish taught me a few things beyond just how to cook salmon or mushy peas.
Firstly, simplicity is powerful. Sometimes, the best meals don’t require hours in the kitchen or a long list of exotic ingredients. It’s about quality and balance. fresh peas, good butter and perfectly cooked salmon.
Secondly, timing is everything. Get the peas just right so they’re creamy but still vibrant green. And don’t overcook your salmon! It’s one of those things that elevates the whole dish.
And lastly, it reminded me that comfort food can be elegant. Nigella’s salmon and mushy peas feel like a cozy meal but with care, it can be something you’d happily serve to guests without a second thought.
FAQs
What Makes Nigella Lawson’s Salmon And Mushy Peas Recipe Unique?
Nigella’s twist on this classic dish lies in her creamy, buttery mushy peas and the way she gently cooks the salmon to keep it tender and juicy. She adds a bit of lemon zest and fresh dill to the peas for an extra zing, making the dish feel fresh yet indulgent.
Can I Use Frozen Salmon For This Recipe?
Yes, you can! Nigella often suggests using frozen fish because it’s convenient, and as long as you defrost it properly (overnight in the fridge), it will still turn out perfectly. The key is not overcooking it, whether fresh or frozen!
How Do I Get The Mushy Peas Just Right? Mine Always Seem Too Lumpy.
A good tip is to mash them thoroughly with a fork or a potato masher until they’re smooth and creamy, then stir in a bit of butter and a splash of cream. If you want them extra smooth, you can even use a food processor. Also, the heat and time are important-don’t rush them!