Let me take you on a little journey to a kitchen that’s as warm and cozy as the feeling you get when you hug a blanket fresh out of the dryer. Picture this: it’s the middle of the afternoon, the kitchen is a bit steamy and there’s an intoxicating smell of chocolate wafting through the air. That’s the kind of experience Nigella Lawson’s Chocolate Mousse Cake brings. It’s not just a dessert. it’s an experience.
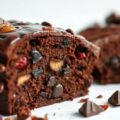
This cake, much like Nigella herself, is effortlessly elegant. You wouldn’t expect it to be as simple to make as it is, considering how rich and decadent it turns out to be. But the beauty of this cake is its mix of unassuming simplicity and indulgence. It’s a flourless cake, so it’s rich, velvety and practically melts in your mouth. A combination of whipped eggs, bittersweet chocolate, butter and a touch of sugar creates this luxurious mousse-like texture that is so addictive, it’s hard to stop at one slice.
Now, I’ve made a lot of cakes in my time but this one is different. It’s like the cake has its own personality-sumptuous, comforting and just a little bit naughty. You know those times when you need a dessert that will make people gasp and yet you don’t want to spend all day in the kitchen? This is it. It’s Nigella at her finest: no pretense, just beautiful, simple and irresistible.
Nigella Chocolate Mousse Cake Recipe
Ingredients Needed
Here’s where Nigella keeps things pleasantly simple. You won’t need to go hunting for obscure ingredients. just a few pantry staples and you’re in business. The trick is in the balance of flavors and the texture, so while the list might seem short, the magic really happens when you bring these ingredients together.
- Dark chocolate (at least 70% cocoa): This is the heart and soul of the cake. Dark chocolate provides the depth and richness but you need to make sure it’s a good quality bar. don’t skimp here!
- Butter: Smooth, unsalted butter is the secret to achieving that silky, melt-in-your-mouth consistency.
- Eggs: You’ll need both whole eggs and egg yolks. The yolks are responsible for the richness and the whole eggs help bind everything together.
- Sugar: Just enough to give a slight sweetness without overpowering the deep chocolate flavor. It’s just a whisper of sweetness, really.
- Vanilla extract: A touch of vanilla rounds out the flavors and adds warmth to the cake.
- Salt: Just a pinch of salt is what elevates the cake’s flavor, balancing the bitterness of the chocolate.
That’s it. These ingredients, simple on their own, become an irresistible, melt-in-your-mouth dessert when combined with a little time, patience and the right technique.
Equipment Needed
Okay, let’s talk tools. nothing too fancy here, I promise! In fact, I love how Nigella keeps things grounded when it comes to equipment. You don’t need a stand mixer or some state-of-the-art gadget, just the basics:
- A saucepan: For melting the chocolate and butter together. Nothing fancy, just a solid saucepan that can handle a little heat.
- Mixing bowls: One for the egg mixture and another for the melted chocolate. The classic glass mixing bowls work just fine.
- Whisk: You’ll need a whisk to beat the eggs and sugar into the light, frothy texture that’s key to the mousse’s fluffiness.
- Spatula: A flexible spatula will help you fold everything together without deflating that precious air you’ve whipped into the eggs.
- Cake tin: A springform tin is ideal because you can easily release the cake without messing it up. A 9-inch round tin should do the trick.
- Parchment paper: A little lining in the tin helps the cake come out smoothly after baking.
That’s all you need. nothing too complicated! In fact, I find that Nigella’s recipes often remind me that you don’t need much more than your intuition and a couple of trusty tools.
Instructions To Make Nigella Lawson’s Chocolate Mousse Cake
Alright, here’s the magic part-the steps. But don’t worry; nothing too complicated here, I promise. I love that Nigella’s approach to cooking is all about getting to the good part quickly, without any unnecessary fluff. So let’s break it down:
-
Preheat The Oven
First, preheat your oven to 350°F (175°C). Line your springform tin with a circle of parchment paper and grease the sides. This makes sure the cake won’t stick and it’ll slide right out when you’re ready to serve it. I can’t tell you how satisfying it is to pop the tin and have the cake come out perfectly smooth.
-
Melt The Chocolate & Butter
In your saucepan, gently melt the butter and chocolate together over low heat, stirring often. It’s like you’re coaxing the ingredients to become something greater. Once melted and smooth, set the mixture aside to cool slightly.
-
Whisk The Eggs & Sugar
While your chocolate mixture is cooling, whisk together the eggs and sugar in a separate bowl. You want to beat it until it’s pale and fluffy, almost like a mousse. This step is key. don’t rush it! The volume you build with the eggs is what gives the cake that cloud-like texture.
-
Combine Chocolate And Egg Mixture
Once the chocolate mixture has cooled a little (you don’t want it hot enough to cook the eggs), fold it gently into the egg mixture. Use a spatula for this; you want to keep as much of that air as possible, so fold gently and don’t overmix.
-
Bake
Pour the combined mixture into the prepared tin, smooth the top with your spatula and bake in the preheated oven for about 25-30 minutes. The cake will rise and then collapse a little as it cools. Don’t worry! That’s exactly what’s supposed to happen.
-
Cool & Serve
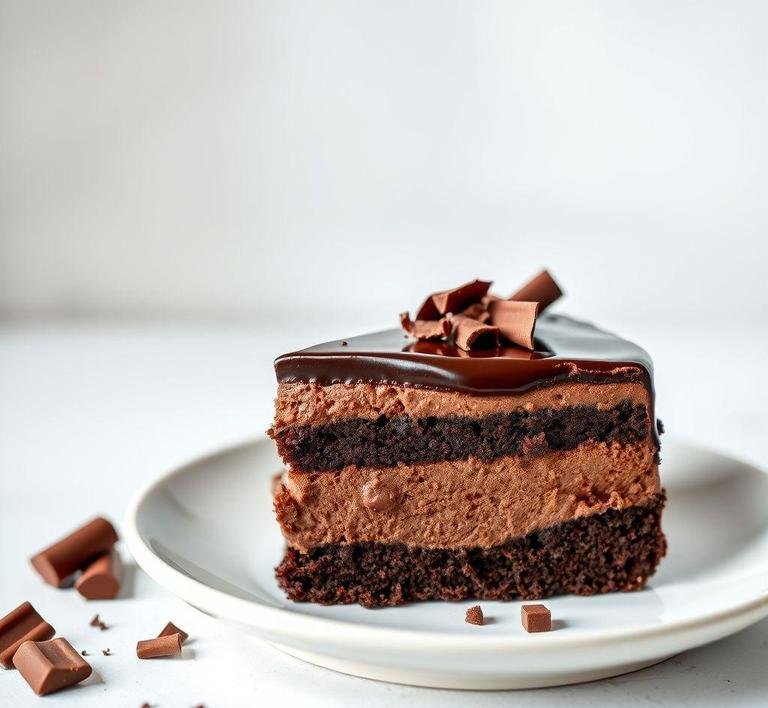
Let the cake cool completely before you remove it from the tin. You’ll notice it’s a bit wobbly in the center-that’s normal. It firms up as it cools. Once it’s cooled, you can dust it with powdered sugar or cocoa powder for that extra touch of elegance. Serve it up with a dollop of cream or a few berries and you’ll be in dessert heaven.
What I Learnt
Making this cake was a revelation, honestly. I’ve baked plenty of cakes in my time but this one taught me something I hadn’t really appreciated before: the power of simplicity. It’s incredible how a handful of ingredients, when combined just right, can create something so luxurious. I thought it would be complicated-fancy, even-but it was so straightforward, so honest. The key is really in the technique, the patience you take in whisking and folding, and, of course, the quality of the chocolate.
Also, there’s something about Nigella’s philosophy in her recipes that really speaks to me. She’s all about making cooking enjoyable and this cake is a perfect example of that. It’s not about perfection but about enjoying the process and the results. I felt like a true baker, even though the recipe didn’t require years of training. That, I think, is the magic of Nigella’s style-anyone can make this cake and feel like a pro.
FAQs
How Do I Make Nigella Lawson’s Chocolate Mousse Cake Extra Rich?
To make this cake even richer, you can opt for a high-quality dark chocolate (around 70% cocoa). The richness of the chocolate will intensify the mousse’s flavor. And, if you want to take it to the next level, add a splash of espresso or a touch of sea salt-both bring out the deep chocolatey goodness in ways that’ll make you wonder why you didn’t do it sooner!
Can I Make Nigella’s Chocolate Mousse Cake Ahead Of Time?
Absolutely! In fact, it’s a great idea. The mousse cake needs time to set in the fridge, so preparing it a day or two ahead gives it time to firm up and develop even more flavor. Just be sure to cover it well with plastic wrap or a cake dome to prevent it from absorbing any fridge odors.
Can I Substitute Any Ingredients For Nigella Lawson’s Chocolate Mousse Cake?
Yes, there are a few swaps you can make. If you’re avoiding gluten, the cake works beautifully without flour-just make sure the chocolate is your main star. For dairy-free versions, you can use coconut cream instead of double cream, and a non-dairy butter substitute works fine for the cake base. While these swaps can change the texture a bit, the end result will still be delicious!