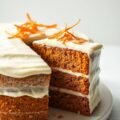
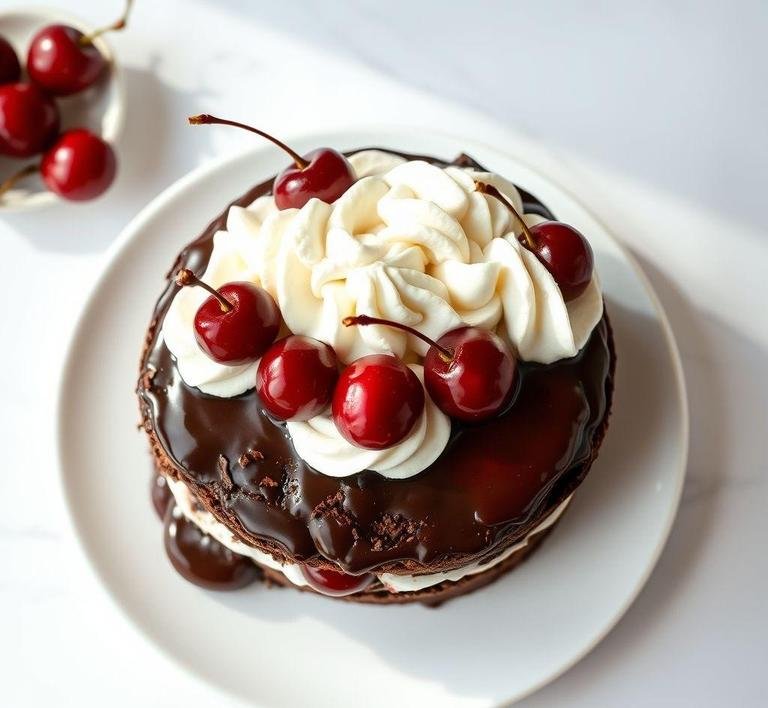
Nigella Lawson’s Black Forest Gateau is a delicious, modern twist on the classic German dessert but with her signature ease and indulgence. Imagine layers of rich, moist chocolate sponge interspersed with luxuriously thick whipped cream, juicy, slightly boozy cherries and a hint of chocolate shavings to top it all off. It’s like a celebration in every bite, with deep, dark chocolate that’s balanced by the sweetness of the cream and the tartness of the cherries.
For me, the magic of Nigella’s version lies in the fact that it isn’t fussy. You know how some traditional desserts require you to follow every little instruction to a T, stressing you out? With Nigella, it’s about enjoying the process and creating something that feels as comforting as it tastes. Her Black Forest Gateau has that perfect balance of decadence without the stress. You could almost feel her reassuring presence in the kitchen, encouraging you to indulge, be a little messy and embrace the joy of baking.
It’s perfect for celebrations but I’ve made it just on a random Sunday when I needed to bring something extra special to the table. It has that feeling of a ’wow’ dessert but without the intimidating reputation.
Nigella Black Forest Gateau Recipe
Ingredients Needed
So let’s get down to the ingredients. but trust me, you’ll love how they come together.
For The Chocolate Sponge
- Butter – 225g (Room temp is ideal but it’ll work even if you forget to take it out!)
- Caster sugar – 225g (A fine sugar helps with texture but if you have regular, that’s totally fine.)
- Eggs – 4 large (Make sure they’re at room temperature to get the best fluff.)
- Self-raising flour – 175g (Nigella’s recipe calls for self-raising flour but if you’ve only got plain flour, just add a teaspoon of baking powder for lift.)
- Cocoa powder – 2 tablespoons (I swear by a good quality cocoa for this. the flavor really makes a difference.)
- Baking powder – 1 teaspoon
- Salt – 1/2 teaspoon (I know, salt in chocolate cake but trust me, it enhances everything.)
- Whole milk – 125ml
- Vanilla extract – 1 teaspoon
For The Filling
- Cherries – 300g (Fresh is great but jarred sour cherries in syrup will do if fresh ones aren’t in season.)
- Double cream – 600ml (You want this to be thick and luxurious, so double cream is key here.)
- Icing sugar – 2 tablespoons (This will sweeten the cream just enough without overpowering it.)
- Kirsch – 2 tablespoons (Kirsch is a cherry brandy but if you can’t find it, a little splash of rum or even cherry juice works fine too. Just don’t skip it. it adds that special touch.)
- Chocolate shavings – for decoration (And let’s be real, who doesn’t love a little chocolate flair on top?)
Equipment Needed
Before you start, there are a few key tools that’ll make this process smoother:
- Electric mixer – You can whip up the sponge and the cream much more easily with an electric mixer. I’ve used a hand-held one and it makes the cake light and fluffy without you having to sweat it out.
- Two 20cm round cake tins. You’ll need these to bake your two layers of sponge. Lining the bottom with parchment paper and buttering the sides ensures easy removal. Trust me, you don’t want your cake to stick after all this effort!
- Whisk – A regular hand whisk or even your electric mixer for the cream works fine. You just want to whip it to soft peaks, not too stiff.
- Cooling rack – Once the cake is out of the oven, it’s important to let it cool on a rack. If you don’t have one, place the cakes on the counter with a little gap underneath. This keeps the air circulating and prevents sogginess.
- Sharp knife – For slicing the cake layers evenly, it helps to have a good, serrated knife. You can also use unwaxed dental floss (yes, seriously!) for an even cut if you’re feeling extra fancy.
- Serving plate – To present your masterpiece! Nigella recommends serving it on something wide enough to hold all that whipped cream and cherries without making a mess.
Instructions To Make Nigella Lawson’s Black Forest Gateau
Here’s the part where the magic happens. assembling everything into that decadent cake.
- Preheat your oven to 180°C (350°F) and line the bottom of your cake tins with parchment paper, buttering the sides for extra precaution. You don’t want any of this glorious cake to get stuck!
- Mix the dry ingredients: Sift together the flour, cocoa powder, baking powder and salt. Put this aside for now.
- Cream the butter and sugar: In a separate bowl, beat the butter and caster sugar together until light and fluffy. This will take about 5 minutes with an electric mixer. You want it to be pale and aerated, like a pillow of sweetness.
- Add the eggs: Crack the eggs into a separate bowl and add them one by one, making sure each one is fully incorporated before adding the next. It’s a simple step but it makes the sponge light and fluffy.
- Fold in the dry ingredients: Once the eggs are mixed in, gently fold in the flour and cocoa mixture using a spatula. You don’t want to deflate the batter, so do this carefully.
- Add milk and vanilla: Finally, add the milk and vanilla extract and give everything one last mix until it’s all smooth and well-combined.
- Bake the sponge: Divide the batter evenly between the two cake tins, smoothing the top. Bake in the preheated oven for about 25-30 minutes. They should rise nicely and feel springy to the touch. Test with a skewer. it should come out clean.
- Cool the cakes: Once baked, take the cakes out of the oven and let them cool in the tins for 10 minutes. After that, turn them out onto a cooling rack and let them cool completely.
- Prepare the cream: Whisk the double cream with the icing sugar until soft peaks form. You want it just firm enough to hold its shape but not too stiff. like a cloud of deliciousness.
- Assemble the cake: Once the cakes are cooled, slice each one in half horizontally, making four layers total. Drizzle the layers with the kirsch or cherry juice for added flavor. Layer the first piece with whipped cream and a generous handful of cherries. Add the second layer and repeat.
- Top it off: Once all the layers are stacked, cover the entire cake with the remaining whipped cream, swirling it beautifully with a spatula. Top with chocolate shavings and a few extra cherries for that finishing touch.
What I Learnt
I learned that baking doesn’t always need to be a labor-intensive, stressful event. Nigella’s Black Forest Gateau proves that with the right recipe, the process can be something to savor. I used to think that the more complicated the recipe, the better the outcome. But her approach changed that. There’s something incredibly satisfying about making something so beautiful with relatively simple ingredients. The cake is like an art form. something you can’t help but admire before you even cut into it. The balance of flavors is key. you’ve got the richness of the chocolate sponge, the airy cream and the tartness of the cherries, all working in perfect harmony.
Also, I definitely learned that the cherry liquor (or Kirsch) is what makes it feel authentically Black Forest. Without it, the cake wouldn’t have the same depth of flavor. It’s one of those ingredients that makes all the difference. And lastly, I learned that the process of making something from scratch can be incredibly rewarding, especially when you get to share it with people who appreciate the effort. Watching someone take a bite and smile, knowing they love what you’ve made, is one of those little joys of life.
FAQs
Can I Use Frozen Cherries For Nigella’s Black Forest Gateau?
Absolutely! I’ve made this cake with frozen cherries in a pinch. Just make sure to thaw them first and drain any excess juice to avoid sogginess in the cake. It works just as beautifully!
What Can I Use Instead Of Kirsch In The Black Forest Gateau Recipe?
If you’re not keen on using alcohol, no worries! You can substitute kirsch with cherry juice or even a splash of fruit-flavored syrup like grenadine. The cake still turns out moist and delicious, just with a different twist.
How Can I Make Sure My Black Forest Gateau Layers Are Even?
This one’s a bit of a personal trick I’ve learned over time: after baking the cake layers, I use a serrated knife to level them out. It’s all about being gentle with the layers so they don’t fall apart. You’ll get that perfect, tidy stack!