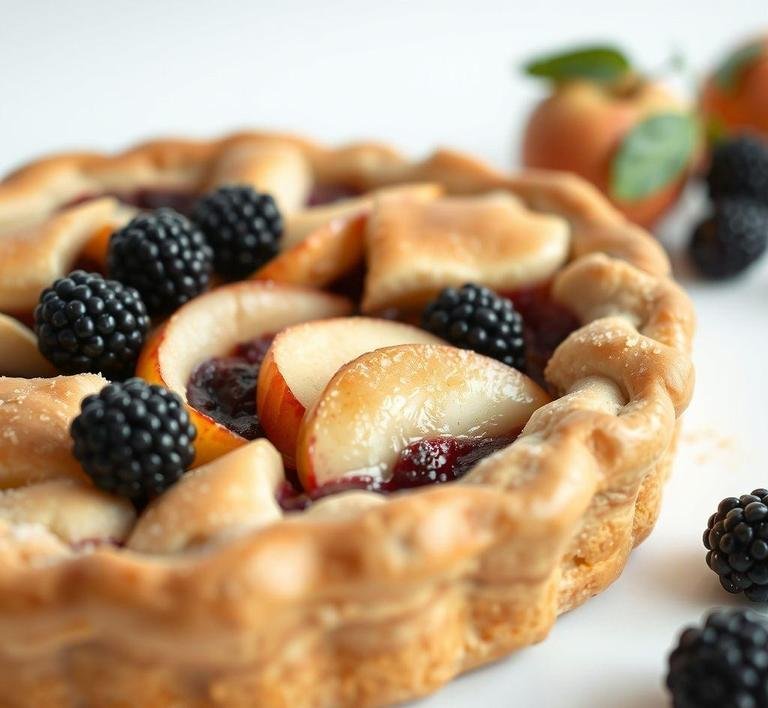
When I first stumbled upon Nigella Lawson’s gluten-free apple and blackberry pie recipe, it felt like discovering a secret treasure. one of those recipes that you instantly want to bake for the people you love. This isn’t just any pie; it’s a vibrant dance of tart blackberries and sweet, tender apples wrapped in a flaky, gluten-free crust that doesn’t crumble under pressure.
What struck me most about this pie is how Nigella manages to capture the essence of comfort food but makes it accessible to those avoiding gluten. a group that’s steadily growing, including many of my friends and family. Usually, gluten-free baking feels like a compromise but this pie is pure indulgence. Imagine biting into a golden crust that gives way to juicy, slightly tangy fruit, the kind that makes your taste buds sit up and pay attention.
There’s something incredibly cozy about the combination of apples and blackberries. like a nostalgic walk through late summer’s fading light, where you pick berries from a hedgerow and savor every bite as if time has slowed down. Nigella’s recipe feels like that moment captured in pie form. It’s a hug on a plate and gluten intolerance doesn’t stand a chance here.
Nigella Gluten Free Apple And Blackberry Pie Recipe
Ingredients Needed
Here’s where the magic starts and I want to be honest: gathering these ingredients felt like prepping for a little ritual in my kitchen.
-
For The Crust
- 200g gluten-free plain flour (I used a mix that included rice and potato starch. makes a big difference in texture)
- 100g cold unsalted butter, cubed (the cold butter is crucial; it’s what creates that perfect flakiness)
- 1 tablespoon icing sugar (to add a subtle sweetness)
- 1 egg yolk (adds richness and binds everything together)
- 2-3 tablespoons cold water (just enough to bring the dough together)
-
For The Filling
- 3 large apples, peeled, cored and sliced (I like using Bramleys for their tartness)
- 150g fresh blackberries (I love when they’re just bursting with juice)
- 100g caster sugar (balances the tartness of the fruit)
- 1 tablespoon gluten-free plain flour (this thickens the filling so it’s not too runny)
- Juice of half a lemon (to brighten the flavors and prevent the apples from browning)
- A pinch of cinnamon (optional but it adds a warm, spicy note that lingers)
I remember once when I didn’t have fresh blackberries, I used frozen ones straight from the freezer. The pie still came out divine, though fresh is always my first choice when it’s in season.
Equipment Needed
It’s funny how certain kitchen tools become little partners in baking adventures. For this pie, I kept it simple but the right equipment made all the difference:
- A large mixing bowl. for combining the dough and the filling separately.
- A food processor (optional but a game-changer for gluten-free pastry dough; it helps bring the butter and flour together quickly without warming the butter too much).
- Rolling pin – I cherish this one; it’s the same wooden rolling pin my grandmother used and it somehow makes rolling dough feel more meditative.
- 9-inch pie dish – I used a classic ceramic one that holds the heat beautifully.
- Pastry brush – for egg wash, if you want that shiny, golden crust.
- Cooling rack – because patience is a virtue and letting the pie cool properly means the filling will set just right.
I remember baking this pie for a small Sunday dinner with friends. The rolling pin was a steady companion as I rolled out the dough while chatting about everything and nothing. That’s part of what made the experience so special.
Instructions To Make Nigella Lawson’s Gluten Free Apple And Blackberry Pie
This part feels like a little dance between precision and intuition. Nigella’s instructions are straightforward but I found that baking this pie invited me to slow down and really enjoy the process.
-
Making the crust:
Start by whisking together the gluten-free flour and icing sugar in your food processor or bowl. Add the cold butter cubes and pulse until the mixture resembles coarse breadcrumbs. This part is my favorite. it’s like sand slipping through your fingers but way more delicious.
- Add the egg yolk and just enough cold water to bring the dough together. It’s a delicate balance. too much water and the dough gets sticky; too little and it won’t hold. I usually add a tablespoon at a time and press gently.
- Wrap the dough in cling film and pop it into the fridge for about 30 minutes. This pause is key to keeping the butter cold and the dough firm.
- Prepare the filling: Toss the sliced apples and blackberries in a bowl with the sugar, gluten-free flour, lemon juice and cinnamon. The flour here thickens the juices as the pie bakes, so you don’t end up with a soggy bottom.
- Preheat the oven to 180°C (350°F). Roll out two-thirds of the dough on a lightly floured surface (I use a bit more gluten-free flour here to prevent sticking). Gently place it into your pie dish.
- Fill the pie dish with the fruit mixture, making sure to spread it evenly. Roll out the remaining dough and either cover the pie completely for a classic look or cut it into strips for a rustic lattice top. I’m partial to lattice because it lets the fruit peek through and the pie looks like a work of art.
- Brush the top of the crust with beaten egg for a golden finish, then pop the pie in the oven.
- Bake for about 45-50 minutes, until the crust is beautifully golden and the filling is bubbling. I always set a timer and sneak peeks because the aroma that fills the kitchen is irresistible.
- Cool the pie on a rack for at least 20 minutes. It’s the hardest part-the waiting-but it helps everything set so when you cut into it, the filling isn’t all runny.
What I Learnt
Baking this pie was a humbling and joyful experience. The first time I tried it, I realized just how much texture matters in gluten-free baking. The cold butter technique made all the difference-flaky crust that actually feels like a treat, not a compromise.
Another thing I learned: patience really pays off. Waiting for the dough to chill, letting the pie cool after baking. these pauses are moments where the magic happens. And honestly, it gave me space to appreciate how simple ingredients, treated with care, transform into something extraordinary.
I also discovered the power of seasonal fruit. Using fresh blackberries made the pie sing in a way frozen fruit simply can’t replicate, though it’s a solid backup. The lemon juice tip Nigella gives was a revelation, too. it keeps the apples from turning that dull brown and brightens the whole filling.
Lastly, sharing the pie with friends and family made the whole process feel like a celebration. Everyone raved about how ’normal’ and delicious it tasted despite being gluten-free. It reminded me that food has this incredible way of bringing people together, no matter the dietary restrictions.
FAQs
Can I Use A Different Type Of Flour For Nigella’s Gluten-free Pie Crust?
Absolutely! While Nigella uses a blend of gluten-free flours in her recipe, you can experiment with different gluten-free flour mixes. Personally, I’ve had great success with a rice flour and almond flour combo for a slightly nuttier flavor. Just be mindful that some gluten-free flours absorb more moisture, so you might need to adjust the liquid a bit.
How Can I Make The Filling Thicker For A Less Runny Pie?
Ah, the classic pie dilemma! If you find the filling a bit too runny, you can mix a spoonful of cornstarch or arrowroot powder with a little cold water and stir it into the apple and blackberry mixture before baking. That’ll thicken things up without affecting the flavor. It’s a trick I picked up from my grandma, who always had the perfect balance of juicy but not soggy pies!
Can I Freeze Nigella’s Gluten-free Apple And Blackberry Pie?
Yes, you can! I’ve done it myself when I wanted to prep ahead for a family gathering. Once baked, let the pie cool completely, wrap it tightly in plastic wrap and then foil. When you’re ready to serve, just bake it from frozen (about 30-40 minutes at 180°C/350°F). The crust stays nice and flaky, and the fruit filling holds up perfectly.